





Last updated on May 5, 2026
How to Set a Blackout Period (Block Time)
A Blackout Period is a period of time when employees aren't allowed to book any leave. This Automation is useful for companies that have high-volume periods and want to implement a blackout period to ensure they have sufficient staff.
Admin must enable firstComplete plan only
The Blackout Period add-on is available on the Complete plan only. It can be set by an Approver or Admin, but an Admin must enable the automation first before an Approver can set their Blackout Period.Setting It Up
- Go to the Vacation Tracker Dashboard — app.vacationtracker.io/signin.
- On the left-hand side, click Workspace Settings → Add-ons.
- Click View on the Blackout Period card under My Add-ons. In case you haven't subscribed yet, switch to the Discover More Add-ons tab and select Blackout Period there.
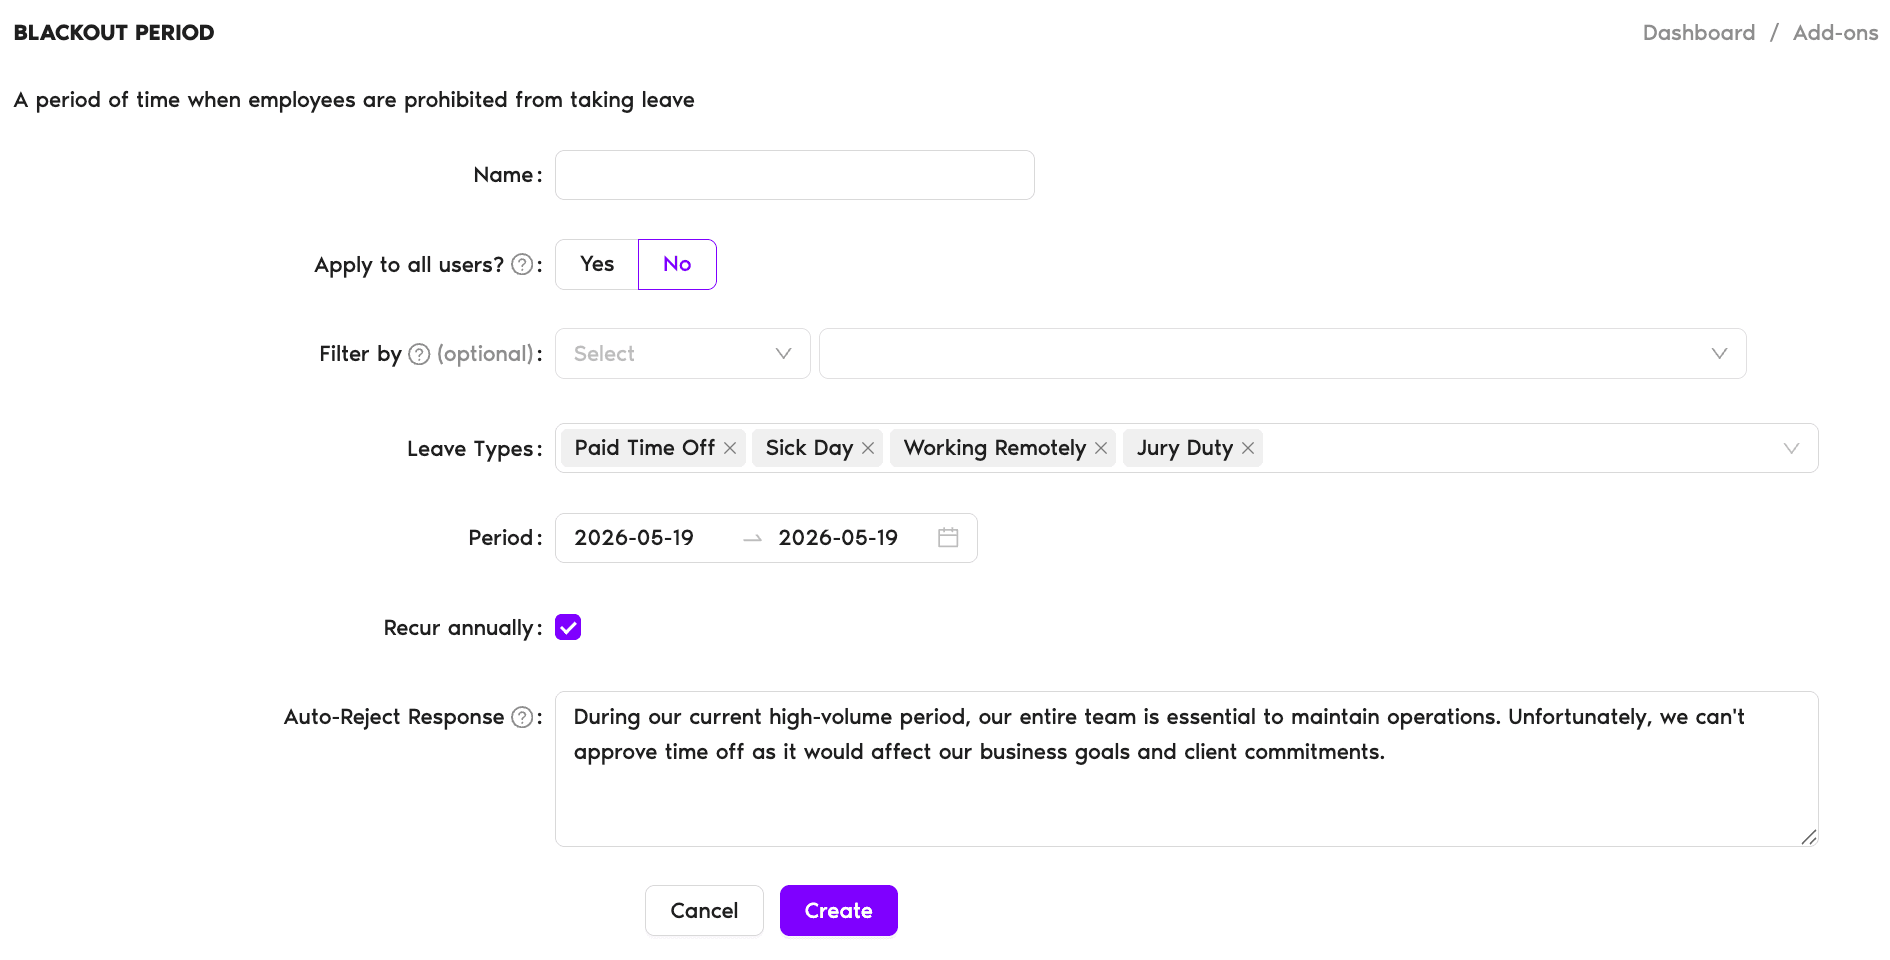
- Click Create automation in the top-right corner.
- Enter a Name: for your Blackout Period.
- Set Apply to all users? to Yes to apply the Blackout Period to all Users within the company, or No to set the blackout period for a particular Location, Department or Label. For details on filtering, see How Do I Set a Blackout Period for a Specific Location or Department?
- Select the Leave Types: the Blackout Period applies to (e.g., Vacation, Paid Time Off, Sick Day, Maternity Leave, Unpaid).
- Set the Period: start and end date for the Blackout Period.
- Tick the Recur annually: checkbox if you want the Blackout Period to repeat in following years.
- Use the default Auto-Reject Response: ("During our current high-volume period, our entire team is essential to maintain operations. Unfortunately, we can't approve time off as it would affect our business goals and client commitments.") or add your own message. The User will receive this automatic response when they try to request leave during the Blackout Period.
- Click Create.
Summary at the bottom
At the bottom of the page, you'll have a summary of how many Users the Blackout Period will affect and a summary of the policy you created.Multiple periods
You can create as many Blackout Periods as needed for different dates. You can revisit any Blackout Period automations you've previously created by going to Workspace Settings → Add-ons and clicking View on the Blackout Period card. The list view shows each policy's Active toggle, Name, Period, Created date, and a delete (bin) icon at the right end of each row.Blackout Period vs Holidays
Blackout Period is different from Holidays. Holidays are automatically non-working days, whereas a blackout period is a block of time Users aren't allowed to request as leave.Browse all automations
For more information and details on other Automations we offer, please see Guide: What Automations does Vacation Tracker offer? Book a Call