




Last updated on October 7, 2026
How Do I Create a Location?
A Location groups users who share the same workweek, holidays, time zone, and leave policies. Most teams create one Location per country or office. It's the container everything else (leave policies, holidays, quota reset rules) hangs off.
How to Create a Location
- Sign in at app.vacationtracker.io.
- In the left-hand menu, expand Leave Setup and click Locations.
- At the top of the Locations page, click Create a Location.
- Fill in the form. The four sections are covered below.
- Click Create Location at the bottom to save.
What Goes in Each Section
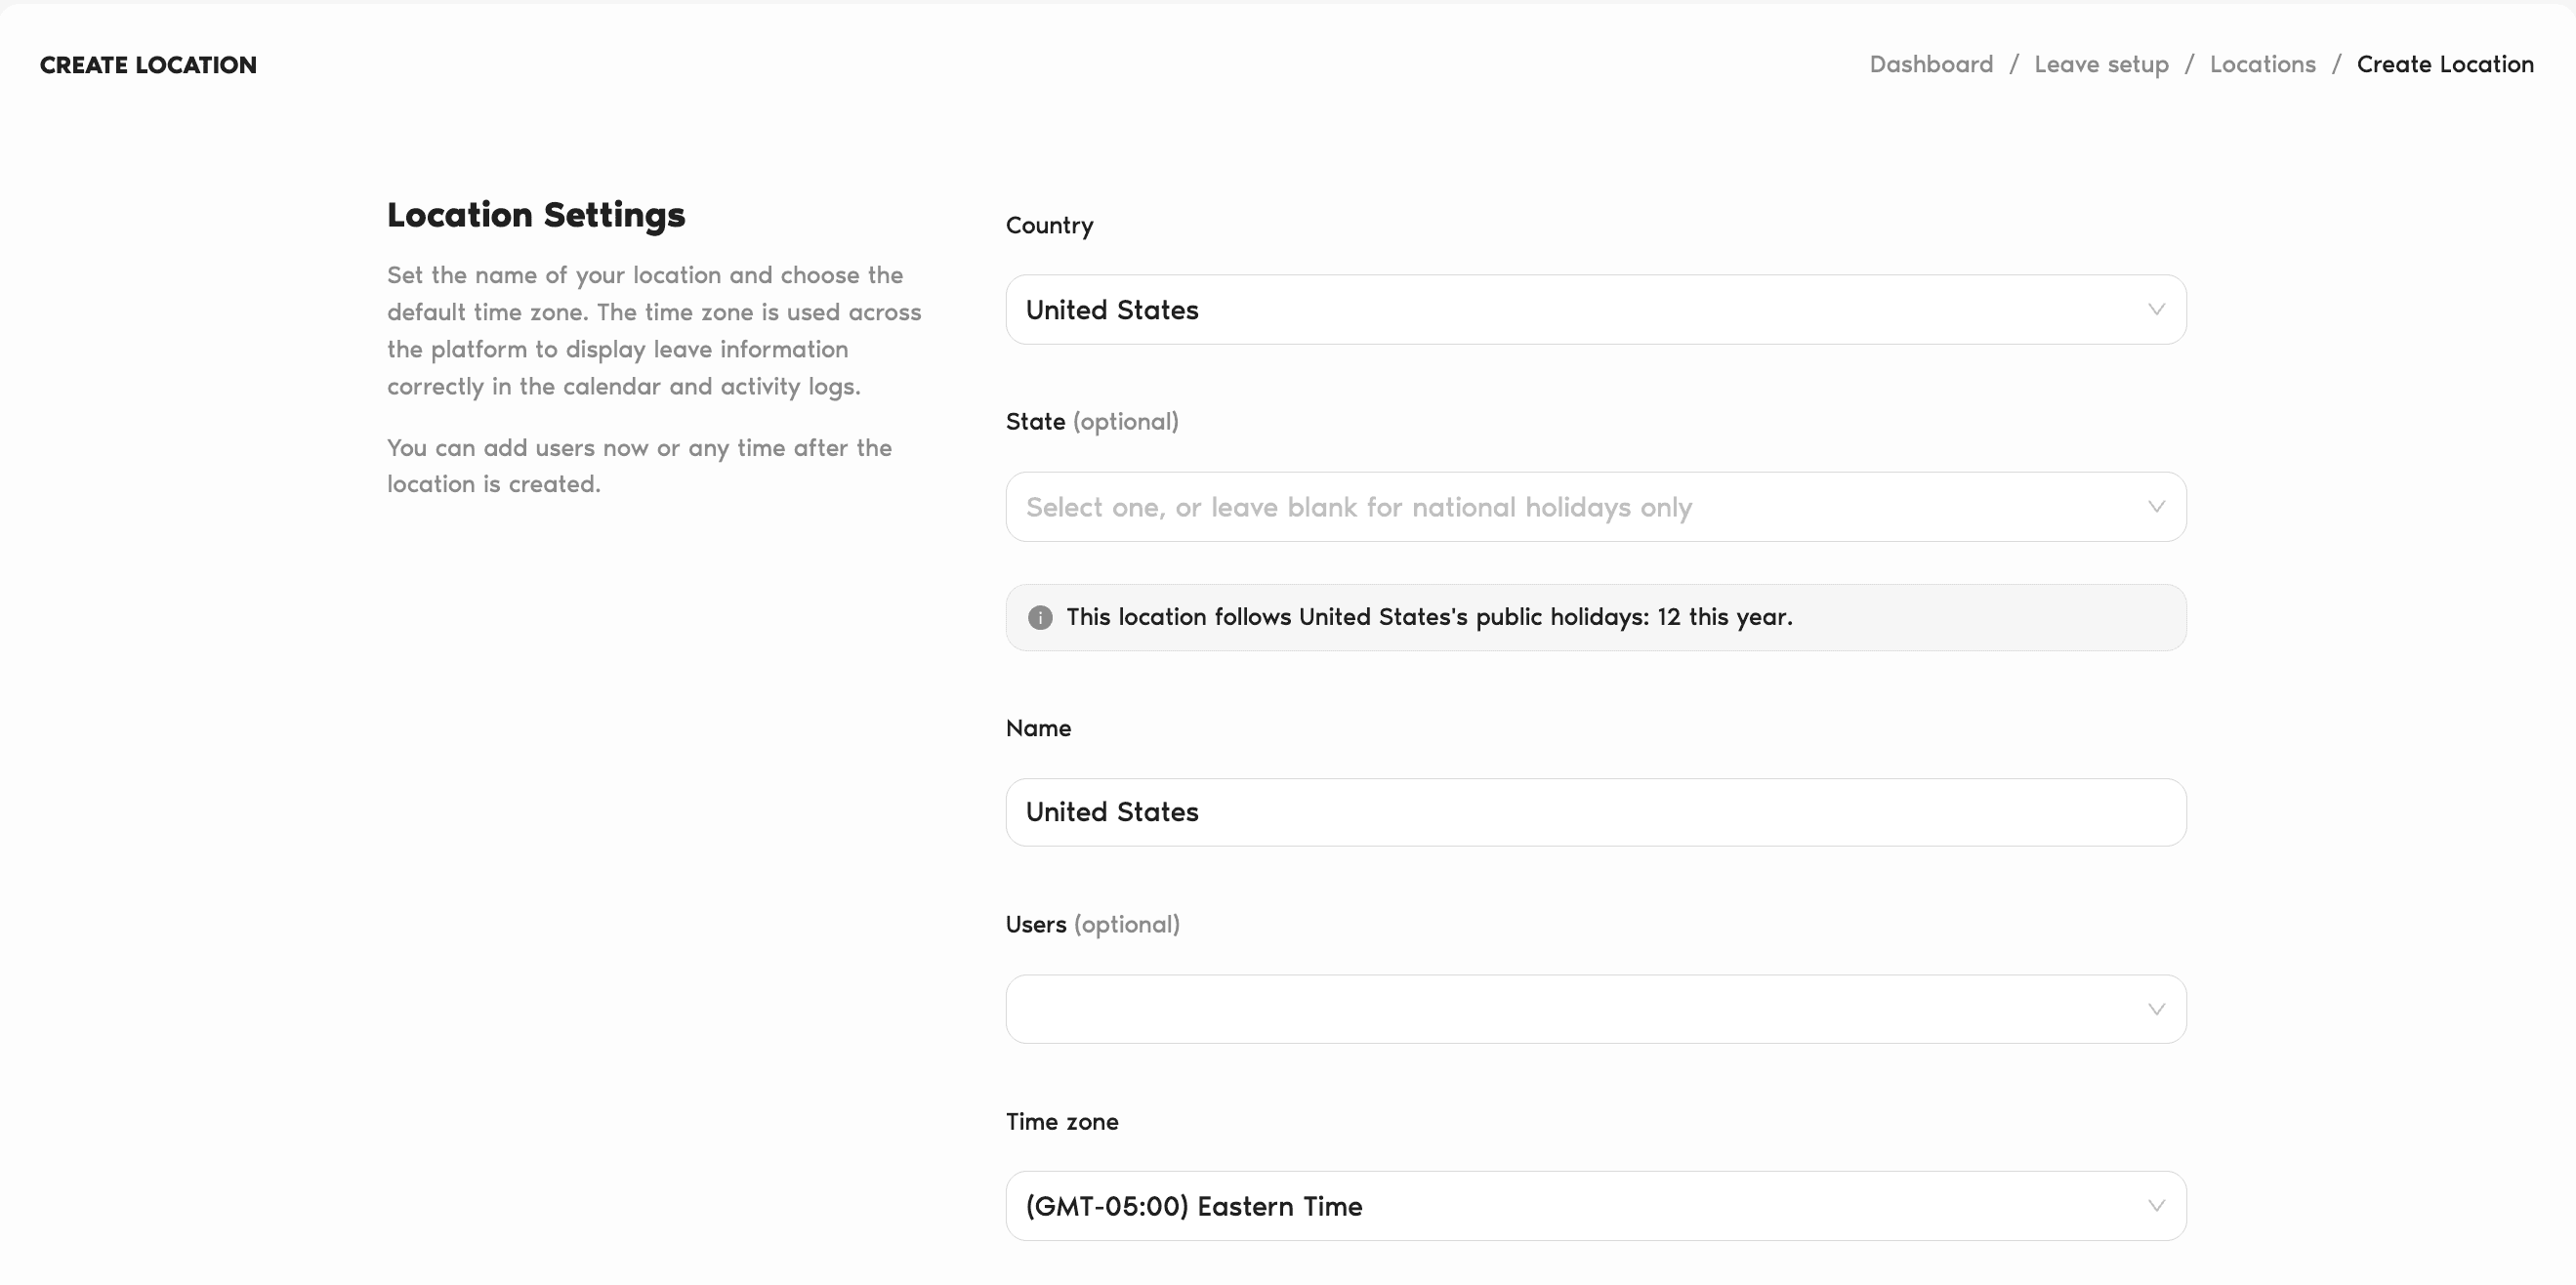
Location Settings
Country Required
The country this Location is based in. Selecting it fills in the Name and Time zone for you, and a note below the field shows how many public holidays will be imported for this year and that 2 leave policies will be created.
State, Province, or Nation Optional
Appears only for countries that have regional holidays. The label matches the country: State (for example, United States or Germany), Province (Canada), or Nation (United Kingdom). Pick a region to include its public holidays, or leave it blank for national holidays only. Selecting a region adds it to the Name, for example "United States · Texas", and updates the Time zone to match.
Name Required
Filled in automatically from the Country and region you select. You can replace it with your own name, for example "Paris HQ". A name you type yourself stays the same if you change the region afterwards.
Users Optional
Pick users from your workspace to assign to this Location now. You can skip this and add users any time afterwards.
Time zone Required
The time zone used for leave calculations, calendar views, and activity logs for users in this Location. It's set automatically from the Country and region you select. Change it if most users in this Location work in a different time zone.
Default Location
Make This Location Default (Yes / No, default No)
If you set this to Yes, all new team members are automatically added to this Location. Useful when you have one main office. Only one Location can be the default at a time.
Workweek and Workday
Workweek
Select the days of the week that count as working days for this Location. Default is Monday to Friday. Leave requests and balances are calculated based on these days. For example, a user in a Location with a Sunday to Thursday workweek won't use balance on a Saturday.
Week Starts On
Controls which day appears first on Calendar views for this Location. Default is Monday. Most teams pick either Sunday or Monday based on regional convention.
Length of Workday Complete plan
How many hours make up a standard workday in this Location. Default is 8 hours. Changing this is only possible on the Complete plan.
Leave Quota and Fiscal Year
Fiscal Year Start
A Month + Day combo that sets when leave quotas reset each year. Default is January 1. Change it if your company's leave year follows a fiscal calendar, for example April 1 for the UK fiscal year or July 1 for an Australian one.
Leave Quota Reset Based On
Two options:
After You Create
When the Location is created, Vacation Tracker sets up the basics for you. It can take a few moments for them to appear on the Location card. Review them before your team starts requesting leave:
Common Questions
Yes, and the limit depends on your plan: Free allows 1 Location, Core allows up to 3 Locations, and Complete is unlimited. See the full plan comparison on the pricing page.
Yes. Open the Location from the Locations page and, on the General tab, hover over the setting you want to change and click the pencil icon next to it. You can rename the Location, change its Country and region, change the time zone, adjust the workweek, or flip the reset basis. Some changes (like switching reset from Accounting Year to User Employment Date) affect every user in the Location, so tread carefully.
No. Each user is in exactly one Location at a time. If someone moves regions, change their Location assignment on the user profile rather than duplicating them.
 Book a Call