
Last updated on July 17, 2025
Keeping track of employee leave is essential, but it doesn’t have to be complicated. From making sure vacation requests don’t overlap to avoiding compliance issues, a good leave-tracking process keeps everything running smoothly.
For small teams, Excel is an easy place to start. It’s familiar and budget-friendly, but it does require you to roll up your sleeves and do some serious manual work to set up and maintain.
Don’t be scared!
In this guide, we’ll walk you through how to build a leave tracker in Excel step by step. We’ll also share tips to make it more efficient and explore what to do when you’re ready to take leave tracking to the next level. Let’s start!
Why You Need a Leave Tracker
Not keeping tabs on vacation days might seem harmless at first, but it can create some serious problems.
Not tracking leave might result in overlaps in vacation time, resulting in delayed deadlines and a dissatisfied team. Poor leave management can also lead to employee burnout. If you’re not making the PTO request process easy and quotas accessible, employees might be too reluctant to request time off and simply suffer in silence. Plus, if you’re monitoring who isn’t taking time off, you won’t be able to predict who might be at risk.
On top of morale, mistakes in PTO management can result in some costly payouts of unused vacation days when an employee leaves your company, and put you at risk of non-compliance with labor laws. These are headaches no one needs!
So, what’s the solution?
A reliable PTO tracking system that not only helps you avoid legal and financial issues but also keeps your team happy. Whether it’s an Excel tracker customized to your needs or a dedicated leave management system like Vacation Tracker, you need a system!
Tracking Can Be
Learn how to manage time off without
confusion, delays, or admin headaches.
Pros and Cons of Using Excel for Vacation Management
An Exce leave tracker l is often the first choice for managing vacation schedules, but is it the best choice? That depends on your needs, and your patience.
Pros
- Budget-friendly: No extra software costs, no lengthy approval process. If your office already uses Excel, congratulations—it’s “free.”
- Customizable: You can tailor your pto tracker to fit your exact requirements, whether that’s accounting for different policies or setting up a dashboard.
- Familiar: It’s been around forever. Most employees have used Excel on the daily and know the basics.
Cons
- Manual labor required: Excel can handle a lot, but only if you’re willing to do the heavy lifting. Updating data by hand is time-consuming and error-prone.
- Not built for PTO tracking: It’s like using a typewriter in the age of computers; it can get the job done, but not without limitations.
- Compliance headaches: Managing complex policies like leave rollovers or accrual calculations can quickly spiral into chaos.
Guide to Building a Holiday Tracker in Excel
You’re probably already familiar with the way Excel works, but even if not, this tutorial for yearly leave tracking with Excel is meant to be accessible and straightforward. You’ll have to apply a few formulas, but it goes no further than a simple copy-paste action. 🪄
Ready?
Here’s how you can create a leave tracker in Excel that works for your team, one step at a time:
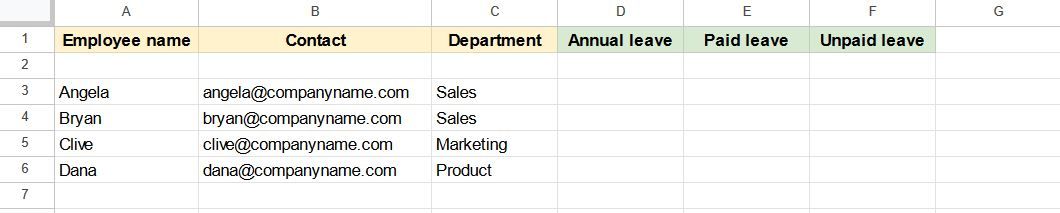
Step 1: Gather Employee Data
Before you even open Excel, you’ll need to collect the basics. Think of every detail your company keeps record of and decide which is useful for your file.
To get you started, we’ve prepared a checklist of useful information to work into the leave tracker. Some items might include:
- Employee names
- Contact Information
- Start Date
- Job Title
- Department
- Manager
- Employment status: part-time or full-time
- Leave laws
- As for the leave fields, there are many different types of paid and unpaid leave to include, but we’ll keep it simple:
- Annual leave
- Paid time off
- Unpaid time off
Step 2: Create The Key For Abbreviations
Typing everything in full will make your Excel PTO tracker too messy to function properly.
That’s why in this step, you’ll create a simple, easy-to-understand key for everything that goes into your tracker. Color coding can help you distinguish whether the time taken off should be paid or unpaid.
It is important to create something extremely straightforward and logical for anyone who needs access to the leave tracker.
Step 4: Create Your Template
Now it’s time to fire up Excel. All you’ll need to start is a simple table.
We’ve included columns for:
- Employee name
- Department
- Leave Types
You can add in any additional columns your organization may need. We also recommend adding filters to make your tracker easy to sort. For example, you can filter by department or leave type to get a quick overview.
Step 5: Format Your Calendar
In the seventh column, in the second cell from the top, enter the date when you’d like your leave tracker to start, in the m/d/y format. We’ll start ours on January 1st, 2024.
Then, select the cell and drag this row all the way to the end of the year, to the NH column. The cells will automatically populate with all the dates in a year. You could also choose to make different sheets for each month.

We’ve decided to shrink those days for better visibility.
To do this, select all the cells with dates, right-click, and pick Format Cells. Then, pick Custom from the menu on the left and pick d. This will let you only display the days.
Now, select the date cells again, pick Column Width, pick 3, then OK.
The tracker should now look like this:

Step 6: Format Your Work Schedule
This next step is optional, but it will make your work far easier in the future. We’ve used conditional formatting to mark the non-working days in red. This works well for teams who work the same Monday-Friday schedule but won’t be as useful for companies that operate 7 days per week with shift workers, like retail stores or hospitals.
Here’s how we did that:
Insert a new row above the dates by right-clicking on row 2 and picking the + Insert 1 row above.
Now, pick the cell G2 and enter the following formula:
=WEEKDAY(E3)
The next step is to pick the cells from G4 to NH7, and then:
Conditional Formatting>New Rule>Use a formula to determine which cells to format, and enter the following formula to mark the Saturdays:
=E$2:N$2=6
Click Format>Fill, and pick the color that marks the weekends, in our case red.
To add Sundays, select the cells from G4 to NH7 again and repeat with this formula:
=E$2:N$2=7
To avoid confusion, hide the row 2, and your tracker should look like this:

Step 5: Automate Calculations with Formulas
Here’s where Excel really starts to shine. Use formulas to automate as much as possible.
To make this leave tracker fully functional, we’ll add the COUNTIF formula, so the days are automatically counted and noted.
Let’s say that Bryan took two PTO days off in January.
Here’s what you’d need to do:
Select E5 (Bryan’s counter for paid leave), and enter the following formula:
=COUNTIF(G5:NH5,“PTO”)
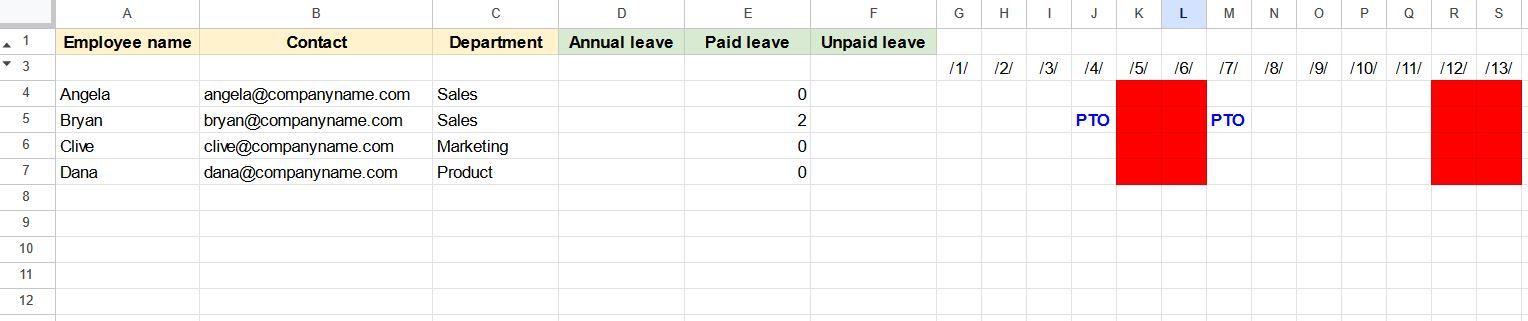
You can use the =COUNTIF formula with the same logic to create counters for other fields.
Bonus tip: Add conditional formatting to flag when an employee’s leave balance is running low. Think bright red cells—it’s hard to miss.
Step 7: Enable Notifications
Excel doesn’t offer built-in notifications, but you can use creative solutions like SharePoint alerts, file history tracking, or conditional formatting to stay updated on leave changes. While these methods require some manual setup, they can help highlight important dates and changes.
Alternatives to Excel for Leave Tracking
While a vacation tracker in Excel might work for small teams, it’s not always the most efficient option. If you’re overwhelmed by this guide or find that manual updates and troubleshooting are taking up too much time, we recommend getting a tool that does it for you.
How does this sound?
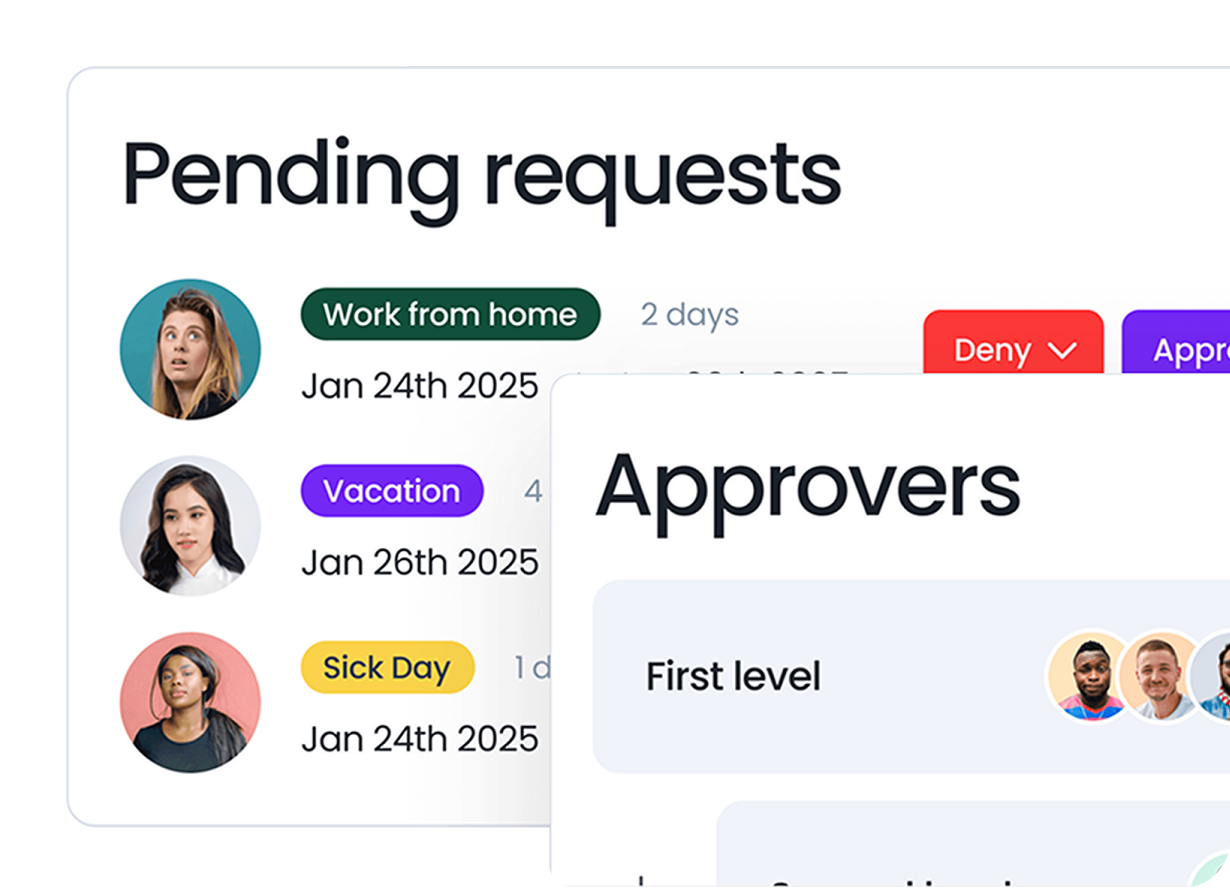
- Employee self-service: Each employee can request days off themselves, and their Approvers handle the requests with a single click. Assign user roles and let everyone do their part!
- Head-to-toe customization: Everything can be easily pre-configured: notifications, employee departments, locations, leave policies, and more.
- Seamless integration: With integrations for Slack, Microsoft Teams, Google Workspace, and email, Vacation Tracker fits into your digital workspace.
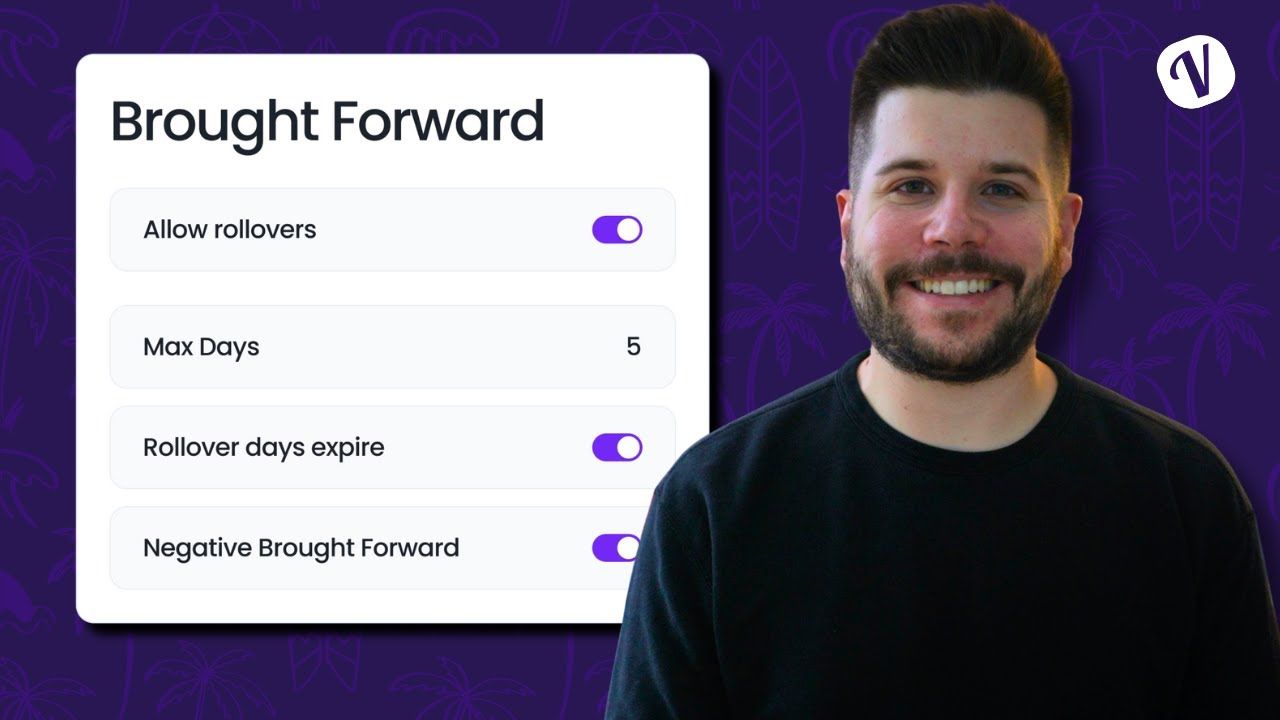
- Advanced leave tracking: Hourly PTO tracking, automated accruals, blackout periods: all set on autopilot. No more manual work and mistakes!
- Scheduled Notifications: Daily and weekly alerts for upcoming leaves are delivered straight to your inbox, Slack, or Teams, so nothing slips through the cracks.
In case that Excel leave tracker doesn’t look too appealing anymore, try Vacation Tracker for free!
Know exactly who's off and when—no spreadsheets, no surprises.![]()
out of time off ![]() tracking.
tracking.![]() No credit card required.
No credit card required.

Claudia
Claudia is an experienced marketer with a passion for writing and creating engaging content that connects with readers.