Last updated on August 18, 2026
How to Connect Vacation Tracker and BambooHR Using Zapier (Three Practical Automations)
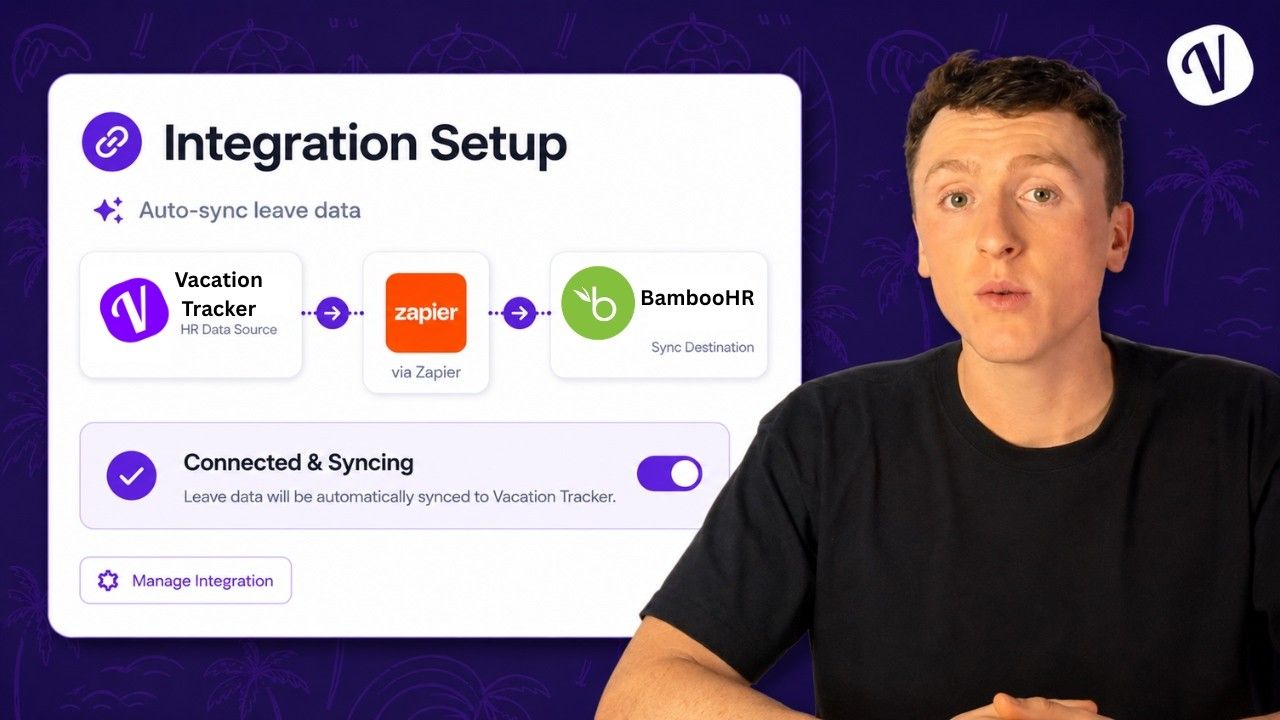
I'm going to show you how to connect Vacation Tracker with BambooHR using Zapier. By the end, you'll have three working automations that keep your leave data synchronized between both platforms.
Watch the full tutorial here to see each step in action:
Why Connect Vacation Tracker to BambooHR
Vacation Tracker handles the approval workflow because it natively integrates where your team already is (Slack, Microsoft Teams, Google Workspace, Web and Mobile app). Employees can request time off without switching tools, and managers can approve with a single click.
But if you use BambooHR as your system of record, you need those approvals to flow into your HRIS automatically. That's where these Zapier automations come in.
The three scenarios I'm covering today are just starting points. Once you understand how these work, you can build whatever connections make sense for your workflow. This is different from setting up an MCP server (which connects Vacation Tracker to Claude or ChatGPT for things like checking team availability or analyzing keyman risk). That's a topic for another day.
Setting Up Your BambooHR API Key
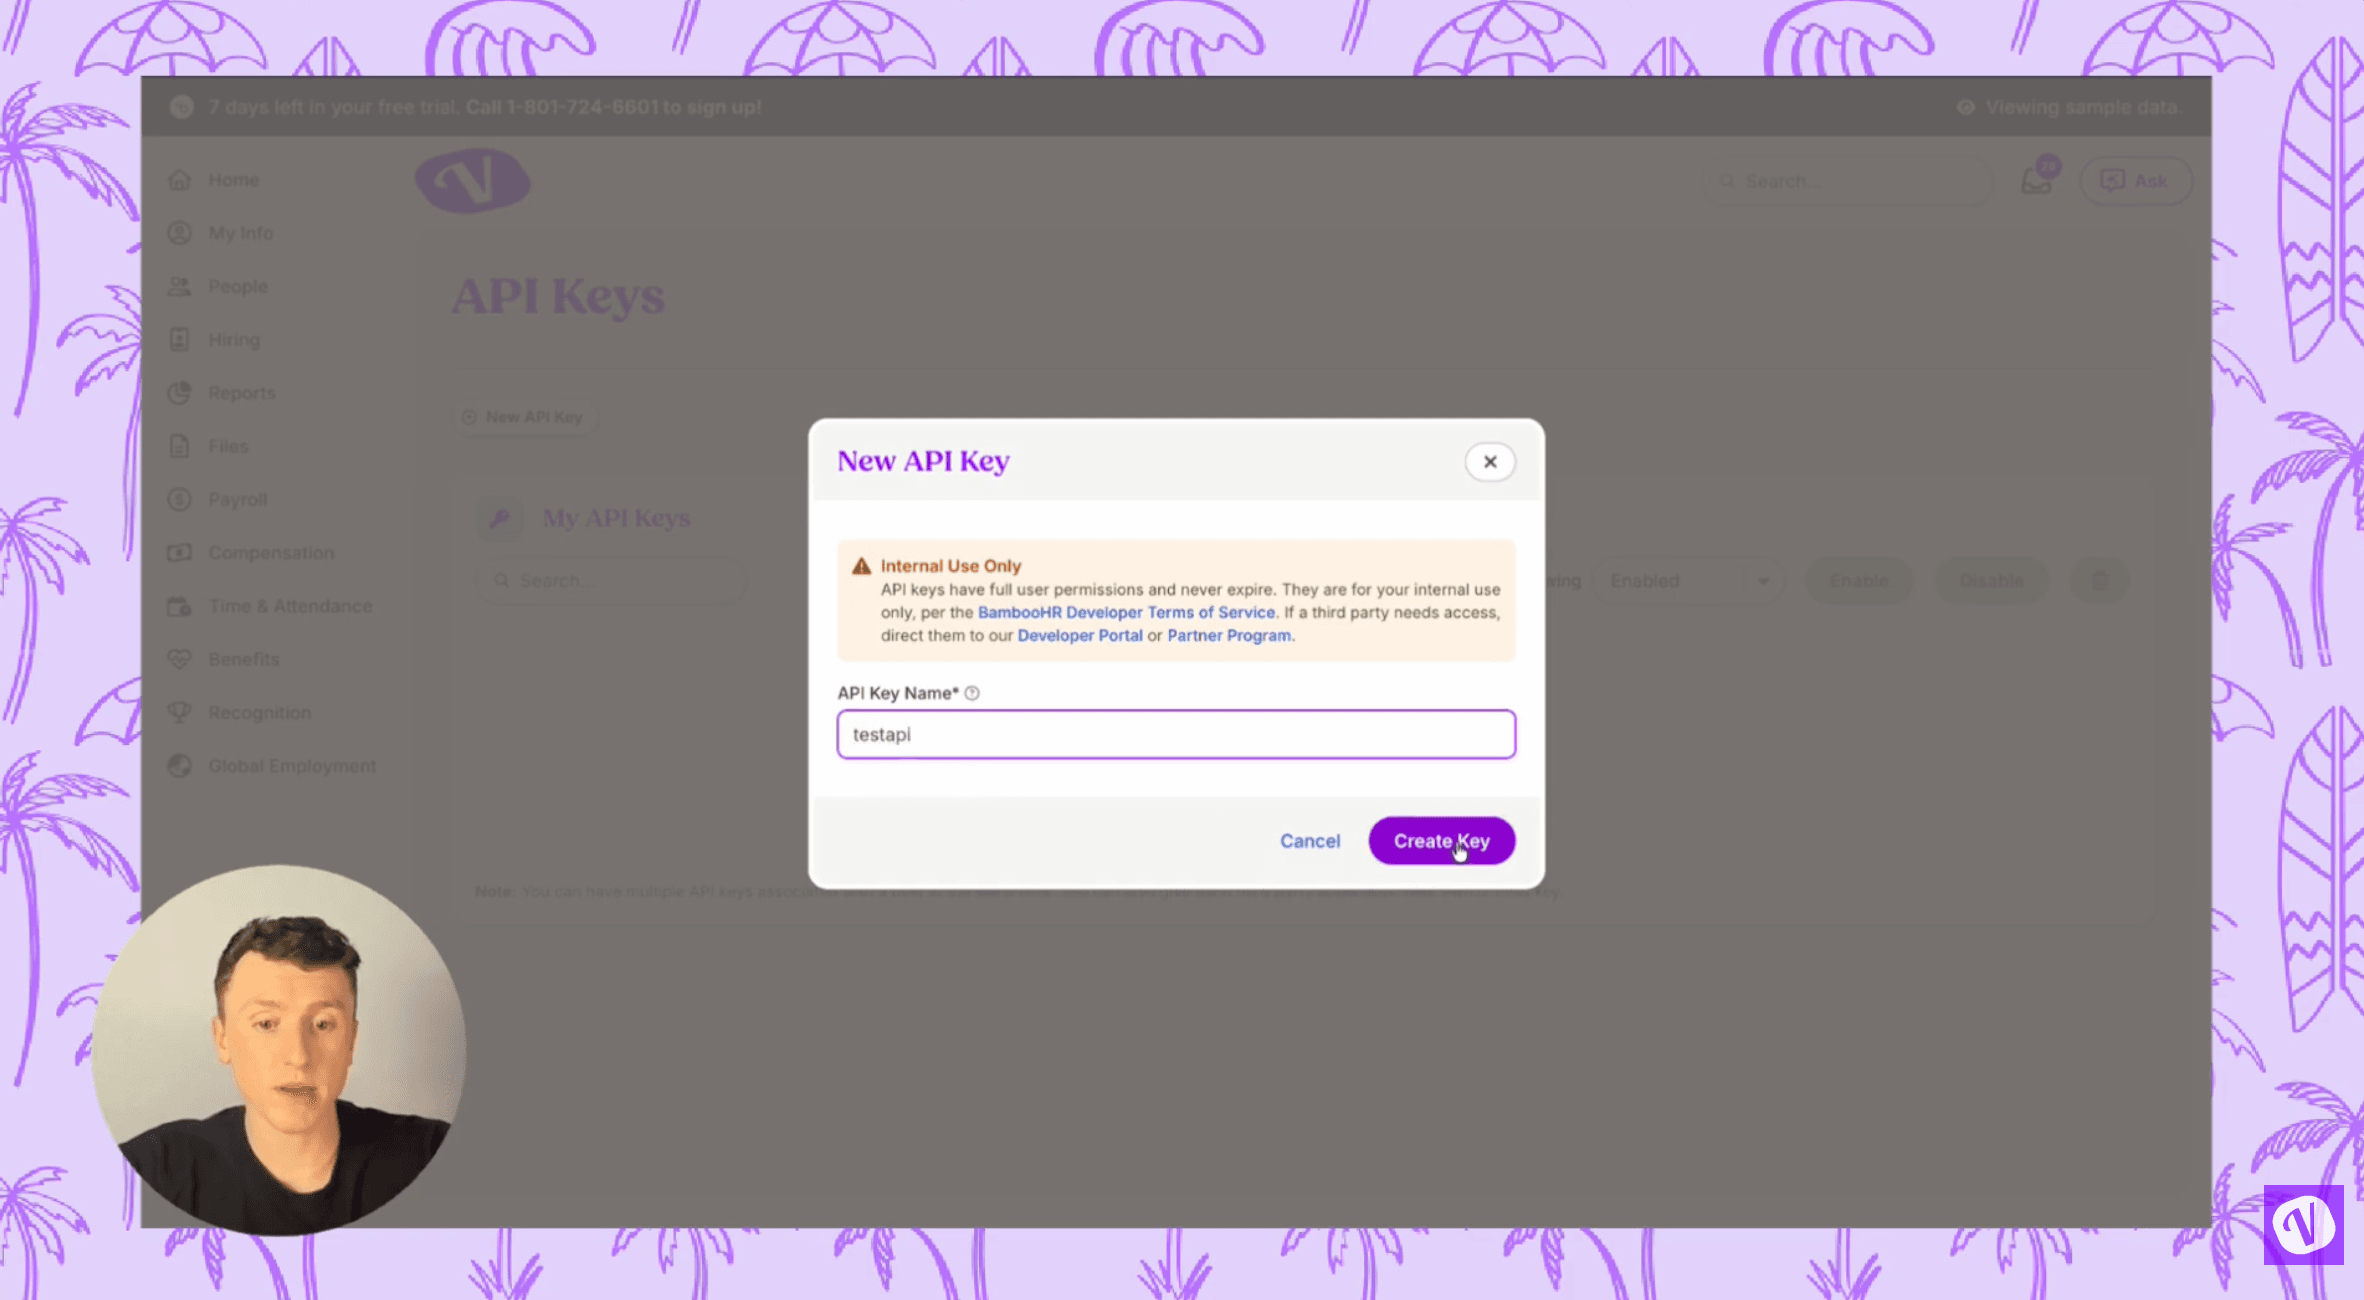
Before you build any automations, you need to generate an API key in BambooHR. Go to your account settings, find the API keys section, and create a new key. Name it whatever you want (I just called mine 'test API'). Copy this key immediately and save it somewhere secure because you won't be able to retrieve it later.
You'll also need your company domain from BambooHR. Look at your URL when you're logged in (it'll be something like 'yourcompany.bamboohr.com'). You only need the subdomain part (the 'yourcompany' bit).
When you connect BambooHR in Zapier, it'll ask for both the API key and your domain. If you're already logged into both platforms in your browser, Vacation Tracker should connect automatically.
The Two Steps Every Automation Shares
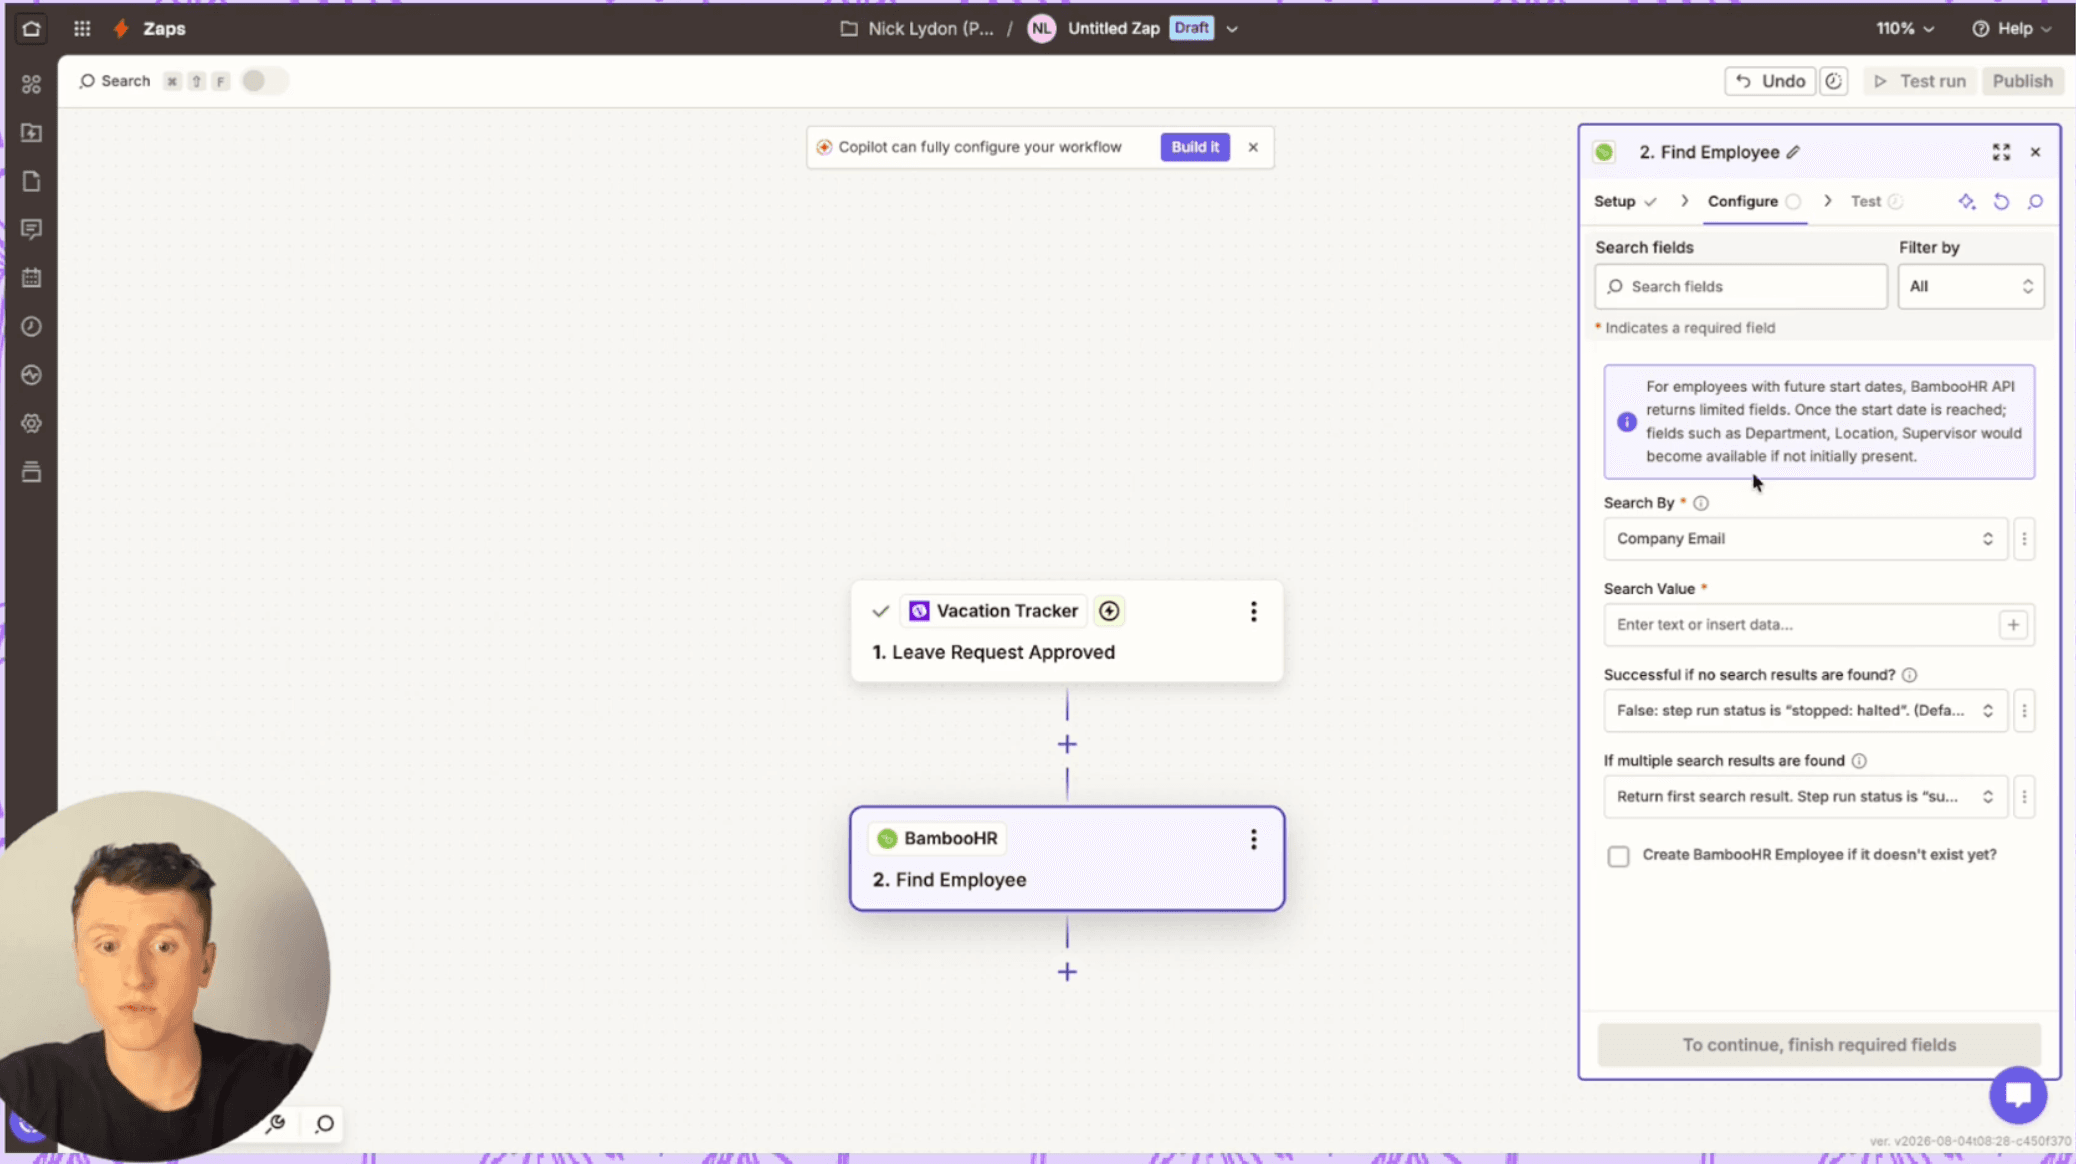
All three automations start the same way. I'm going to explain this in detail now, then move faster through the second and third scenarios since you'll already know the setup.
Step 1: Set the trigger in Vacation Tracker
In Zapier, create a new Zap and select Vacation Tracker as your trigger app. Choose 'Leave Request Approved' as the trigger event. This means the automation fires every time a manager approves time off. Test the trigger to make sure it's pulling data correctly.
Step 2: Find the employee in BambooHR
Add a new step and select BambooHR. Choose 'Find Employee' as the action. You'll search by company email, and you'll pull that email from the Vacation Tracker data in Step 1. Click the plus button in the search value field, select Step 1, and scroll down to find 'User Email'. Test this step to confirm it's finding the right employee.
This two-step pattern works because Vacation Tracker identifies people by email, while BambooHR uses internal employee IDs. Step 2 is the bridge that connects them.
Automation 1: Auto-File Leave Approvals as Documents
This automation creates a leave confirmation document and files it in the employee's BambooHR record. It's useful for maintaining a paper trail of all approved time off.
Step 3: Create a Google Doc from template
Add a new step and select Google Docs. Choose 'Create Document from Text'. You're building a simple confirmation document using data from Vacation Tracker.
For the document name, click the plus button and select 'Username' from Step 1. For the content, add fields like leave type, start date, and end date (all available in the Step 1 data). Test this step to make sure the document generates correctly.
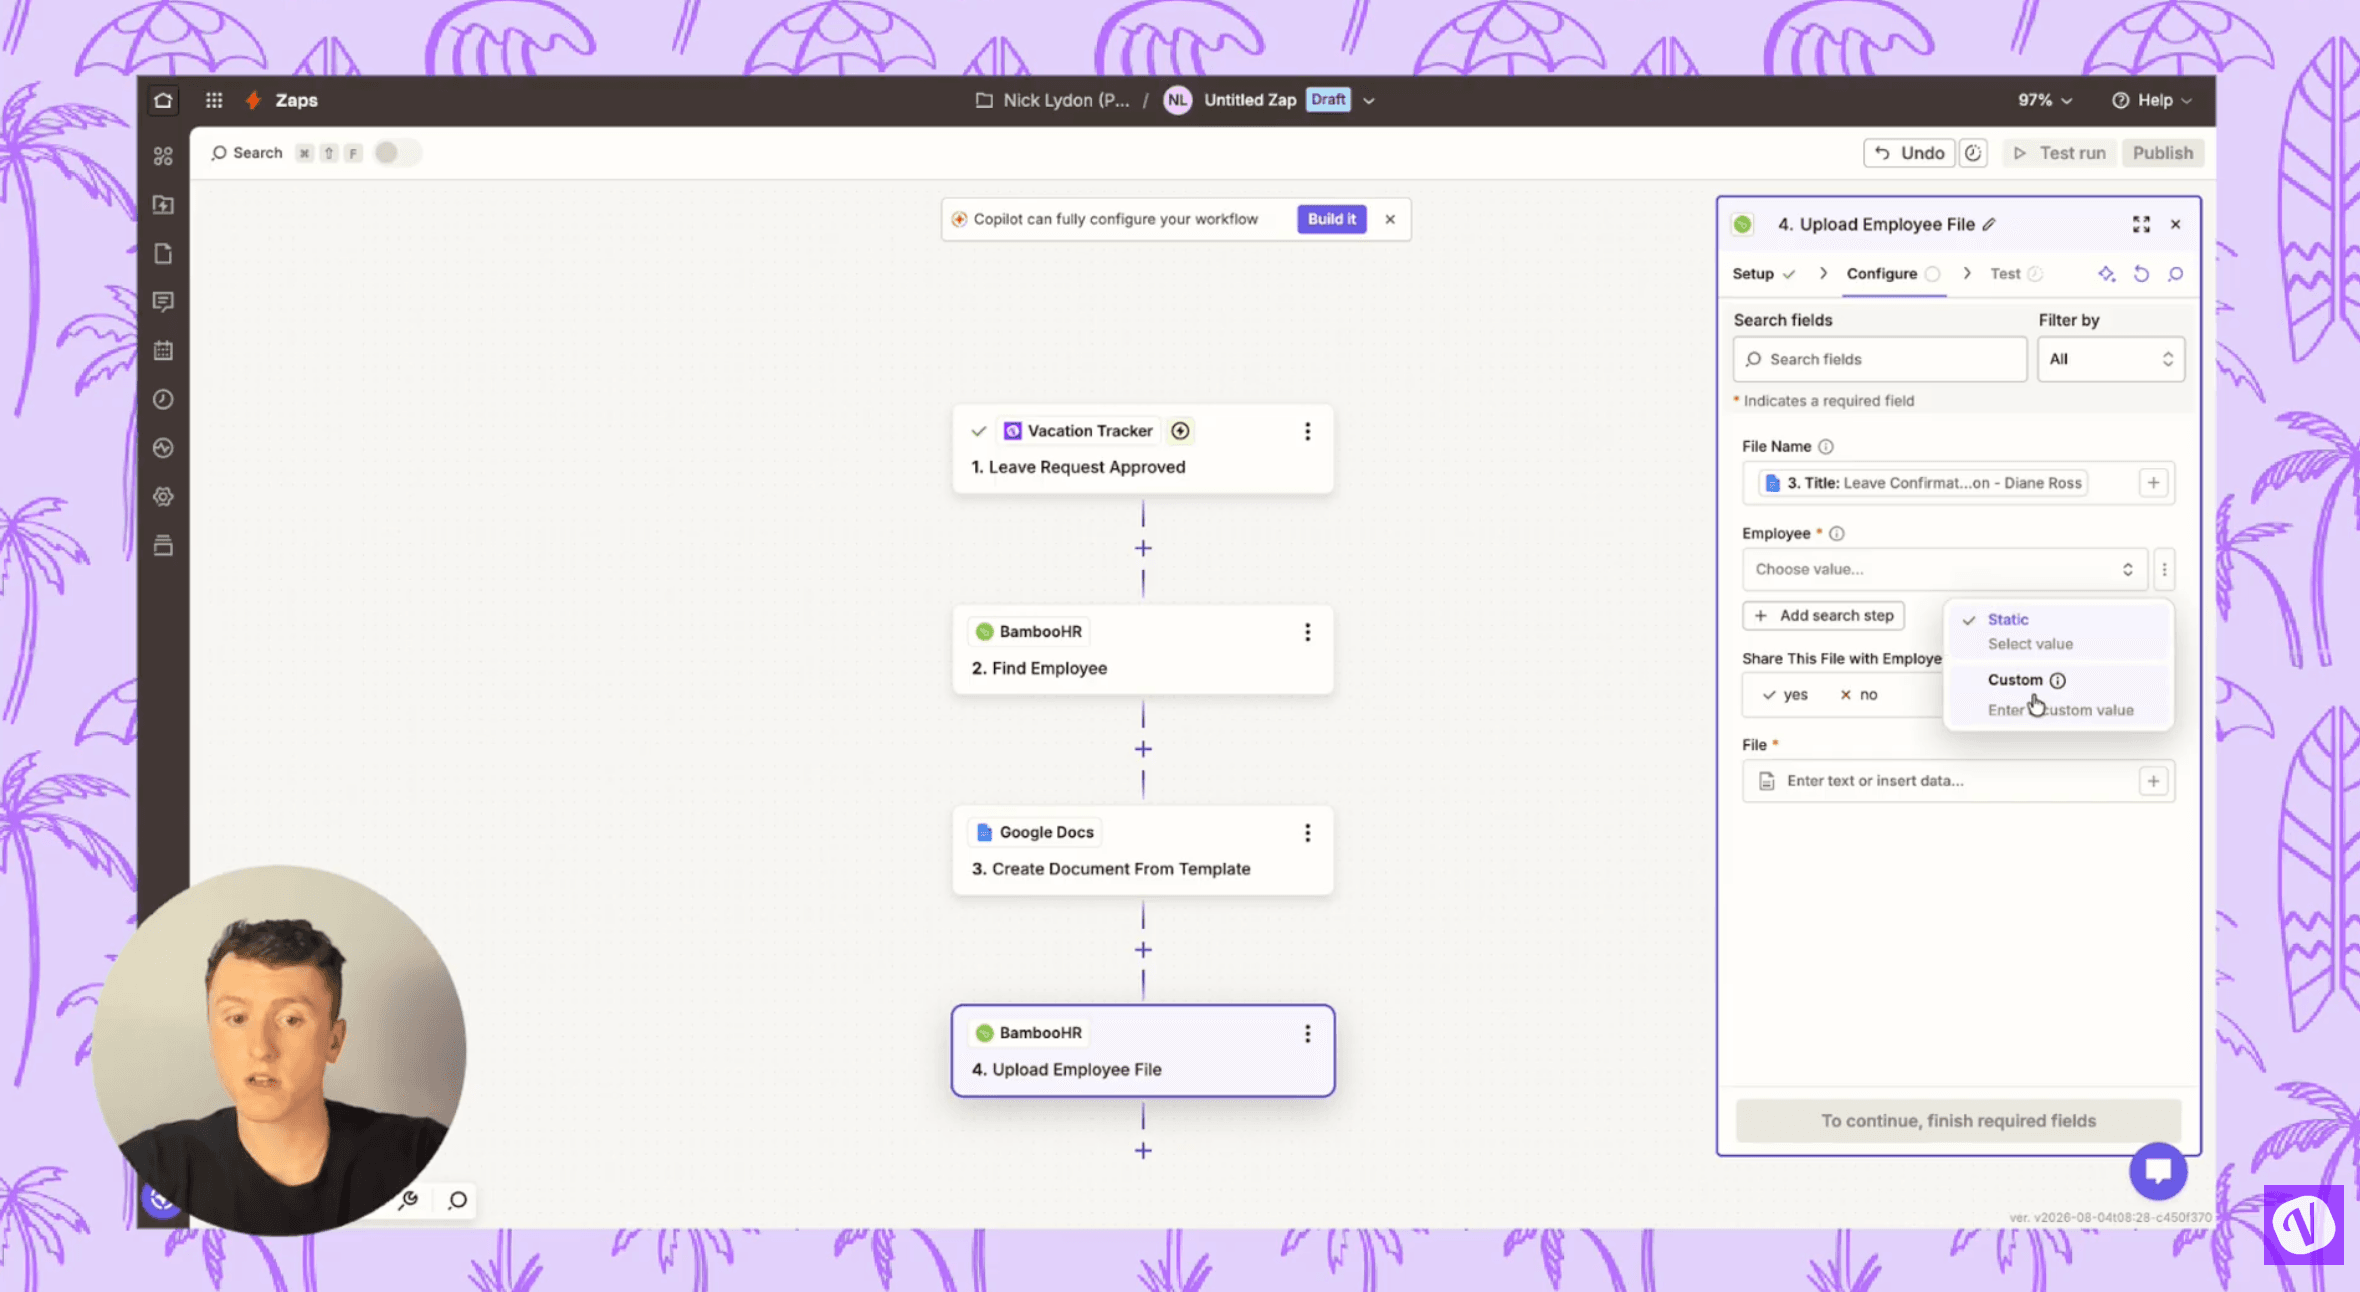
Step 4: Upload the document to BambooHR
Add another BambooHR step and select 'Upload Employee File'. For the file name, click the plus button and select the document title from Step 3. For the employee field, click the three dots to create a custom field, then select the employee ID from Step 2.
Choose which category you want the document filed under in BambooHR. I used 'Signed Documents', but you can create custom categories in BambooHR and they'll appear in this dropdown.
For the file itself, you'll need to select an export link from Step 3. The ideal option is 'Application PDF', though I ran into issues with this on my trial account. You might need to experiment with different export formats.
Test the step, then go into BambooHR and check the employee's documents folder. You should see the leave confirmation filed there.
Automation 2: Send Approved Leave to Timesheets
This automation adds approved leave directly to employee timesheets in BambooHR. It's particularly useful for hourly teams or when you need leave tracked alongside regular work hours.
I'm setting this up for full-day leave only. You can adapt it for half-day or hourly leave, but that requires more complex logic.
After completing Steps 1 and 2 (trigger and find employee), add this:
Step 3: Add timesheet clock entries
Add a BambooHR step and select 'Add Time Sheet Clock Entries'. For employee ID, select the ID from Step 2. For the date, select the start date from Step 1.
Since this is a full-day leave, you can manually enter the start and end times (I used 9:00 to 17:00 for an 8-hour workday). If you want to handle partial days, you'd need to add logic that calculates hours based on the leave type from Vacation Tracker.
Test the step. If you have BambooHR time tracking enabled (which I didn't on my trial account), this should populate the timesheet automatically.
Automation 3: Update Current Leave Status in Real-Time
This automation updates a custom field on employee profiles to show who's currently on leave. It's the most technically involved of the three because BambooHR doesn't expose custom fields directly in Zapier, so you need to make a custom API call.
Pre-step: Create a custom field in BambooHR
Before building the automation, go to BambooHR settings and navigate to 'Custom Fields and Tables'. Add a new custom field. I named mine 'Current Leave via VT' (VT for Vacation Tracker). Set the type to 'Short Answer' and mark it as optional. Choose which tabs you want it to appear on (I selected Personal and Job).
Steps 1 and 2: Same as before
Set up the trigger (Leave Request Approved) and find the employee in BambooHR using their email.
Step 3: Make a custom API request
Add a BambooHR step and select 'API Request'. This is where it gets technical, but I'll walk you through it.
First, search for 'method' in the configuration fields. Select 'POST' from the dropdown.
Next, search for 'URL'. Enter this format (replace 'yourcompany' with your actual BambooHR subdomain):
https://YOURS.bamboohr.com/api/v1/meta/v1/fields/
Then after you put that URL in you can add the employee ID, click the plus button and select ID from Step 2.
Now search for 'headers'. Add a header with 'Content-Type' on the left and 'application/json' on the right.
Finally, search for 'body'. This is the tricky part. You need to find your custom field's ID number from BambooHR. Here's how:
Open a new browser tab and go to the same url as above: https://yourcompany.bamboohr.com/api/v1/meta/fields/
This loads an XML file with all your field IDs. Search for your custom field name ('Current Leave via VT' in my case). You'll see a field ID number next to it (mine was 4624).
Back in Zapier, enter this in the body field (replace 4624 with your actual field ID):
{'4624':'On Leave'}
Test the step. Then go to BambooHR, open an employee profile, and check the Job tab. You should see 'On Leave' in your custom field (assuming they are indeed, on leave).
If you run into errors, take screenshots and paste them into Claude or ChatGPT. These tools are surprisingly good at debugging Zapier automations, especially API calls.
What to Do When You Get Stuck
I'm working with a trial BambooHR account in this tutorial, so some features look different than they will on a paid plan. If something doesn't work exactly as I described, don't rage quit. Use AI to troubleshoot.
Take a screenshot of your Zapier configuration and any error messages. Paste them into Claude or ChatGPT and ask what's wrong. I've found these tools remarkably helpful for fixing automation issues.
You can also reach out to our team directly. We have developers who can help you set up these connections. Check out our knowledge base for more resources like this.
Getting Started with Vacation Tracker
If you're new to Vacation Tracker, you can start with a 14-day free trial at app.vacationtracker.io/signup. It works with Slack, Microsoft Teams, Google Workspace, and email, so your team can request time off without switching tools. We also have mobile apps for iOS and Android.
For more product tutorials, subscribe to our YouTube channel and check out our Vacation Tracker Academy Channel for more product specific content!
You can download the full instructions PDF for these automations here: drive.google.com

Nicholas Lydon
Nick is the Content Marketing Manager at Vacation Tracker, where he turns leave management, HR headaches, and the occasional oddly specific PTO question into content people can watch. He spends most of his time creating videos, articles, campaigns, and creative experiments that make HR a little less boring.