Last updated on February 13, 2026
Data Import: Importing Leave Data Using Our Template
The Vacation Tracker import template ships with the correct headers and column mapping pre-built. Download it, fill in your historical leave data, and upload — the import wizard walks you through validation in four short steps.
File Format
The Bulk Uploads page accepts .xlsx, .xls, or .csv files directly — there's no separate format picker. Both Excel and CSV go through the same wizard.
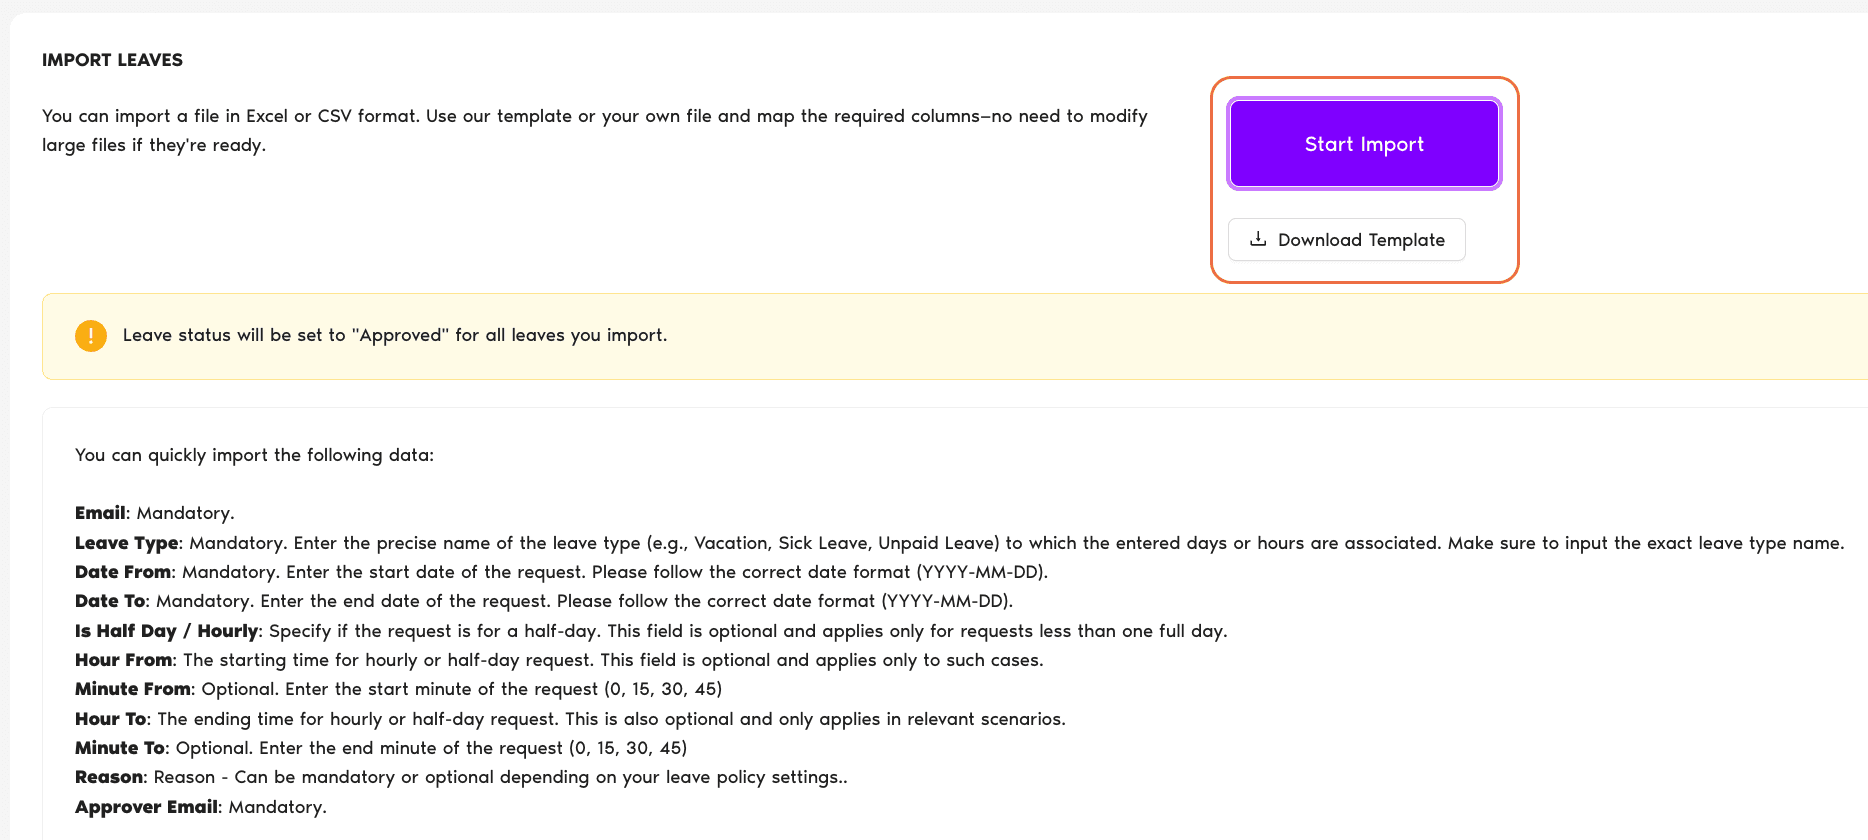
The import page itself describes it like this: "You can import a file in Excel or CSV format. Use our template or your own file and map the required columns—no need to modify large files if they're ready."
Required and Optional Fields
| Field | Required | Notes |
|---|---|---|
| Mandatory | The User's email — must match Vacation Tracker. | |
| Leave Type | Mandatory | Exact name of the Leave Type (e.g. Vacation, Sick Leave, Unpaid Leave). Must match a Leave Type configured in your workspace. |
| Date From | Mandatory | Format: YYYY-MM-DD |
| Date To | Mandatory | Format: YYYY-MM-DD |
| Is Half Day / Hourly | Optional | For partial-day leave. Applies only to requests less than one full day. |
| Hour From | Conditional | For half-day or hourly only — start hour. |
| Minute From | Optional | Start minute: 0, 15, 30, 45. |
| Hour To | Conditional | For half-day or hourly only — end hour. |
| Minute To | Optional | End minute: 0, 15, 30, 45. |
| Reason | Mandatory or optional | Depends on the Leave Policy settings for that Leave Type. |
| Approver Email | Mandatory | Email of an existing Approver on the User's Department. |
Steps to Import
- Sign in at app.vacationtracker.io as an Admin.
- In the left menu, expand Workspace Settings and click Bulk Uploads.
- On the Bulk Uploads page, click View on the Leaves card.
- Click Download Template.
- Open the template, fill in your leave history (one row per leave), and save.
- Back on the Leaves page, click Start Import — the wizard opens.
The 4-Step Wizard
1 — Leaves
Drop your file or click Select file to upload. Accepts .xlsx, .xls, or .csv.
2 — Select header row
The system selects the first row by default. Confirm it's correct (it will be, with the template) and click Next.
3 — Match Columns
Map each header from your file to a Vacation Tracker field. With the template, the columns will match automatically — click Next.
4 — Validate data
The wizard flags errors row by row — wrong email addresses, Leave Types that don't exist, malformed dates. Either:
When the data looks clean, click Confirm — the import begins.