Last updated on February 13, 2026
How Do I Import Users Profile Data?
If you’re setting up Vacation Tracker for the first time or updating your records, you can import user profile data in just a few quick steps.
Vacation Tracker automatically pulls basic info—like first name, last name, and avatar—from your workspace directory.
For other details, such as Department, Location, Start/End date, you can use the Import User Profile Data feature to update them.
When editing Users in bulk, it’s much faster to update all this information through the Import section rather than editing each profile individually.
Before you start: make sure you have Admin access in Vacation Tracker, since only Admins can import user profile data.
Step 1. Go to the left-hand menu in Vacation Tracker and select the Bulk Uploads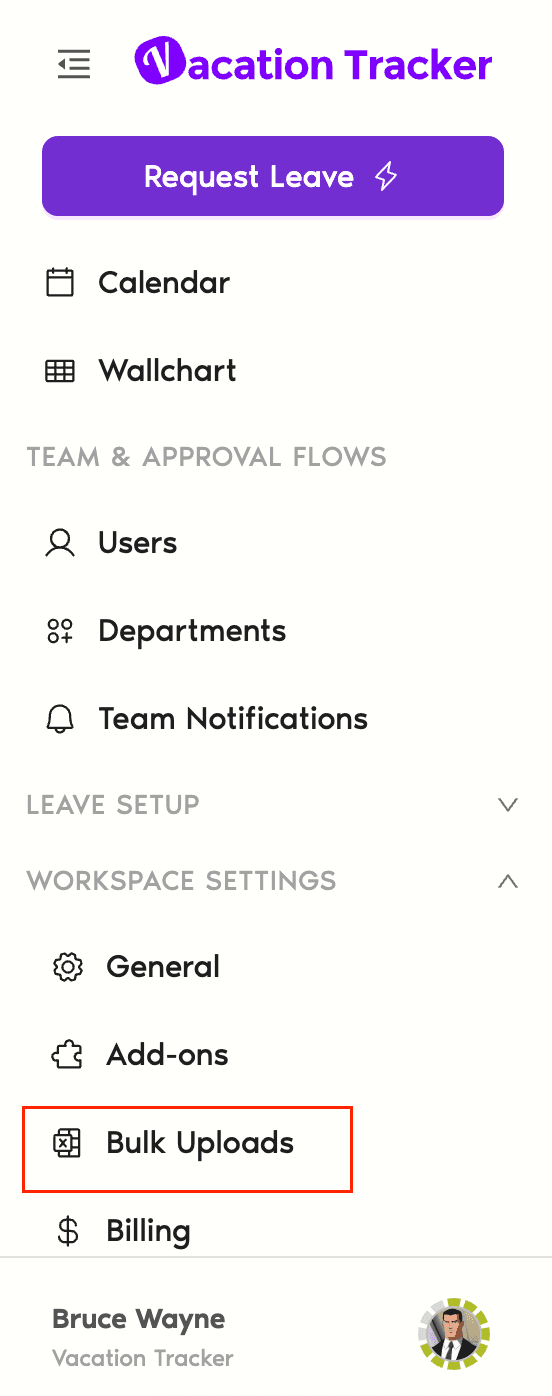
Step 2. Click on User Profile Data. 
Step 3. Download the template (CSV or Excel) and fill it in with details like Email, Department, Location, and Start Date. 
Step 4. Please head back to the Imports section and go to the “User Profile Data”, but this time, click on the purple button “Start Import”.
Step 5. Follow the prompts to match each column from your file with the correct fields in Vacation Tracker. Double-check everything before submitting. 
Step 6. Once submitted, you’ll see a confirmation page. 