Last updated on February 13, 2026
How Do I Limit Users' Leave Duration?
Managing a team is not an easy task, especially when vacation season comes around. With everyone trying to take leave, the Leave Duration Limit automation lets you cap how much time a User can take during a specific time period — so you can plan tasks around the season without anyone monopolising the calendar.
What It Does
The Leave Duration Limit automation lets you limit the amount of time Users can take during a specific time period. This should allow you to plan out tasks for the team even when the vacation season comes.
Setting It Up
- Go to the Vacation Tracker Dashboard — app.vacationtracker.io/signin.
- On the left-hand side, click Workspace Settings → Add-ons.
- Click View on the Leave Duration Limit card under My Add-ons. If you haven't subscribed yet, switch to the Discover More Add-ons tab, select Leave Duration Limit, and confirm the subscription before continuing.
- Click Create policy in the top-right corner.
- Fill in the options (see field reference below).
- Choose who this policy applies to (see scoping section below).
- Once everything is set, you'll see a summary of the automation you created at the bottom. If you're happy with how everything looks, click Save.
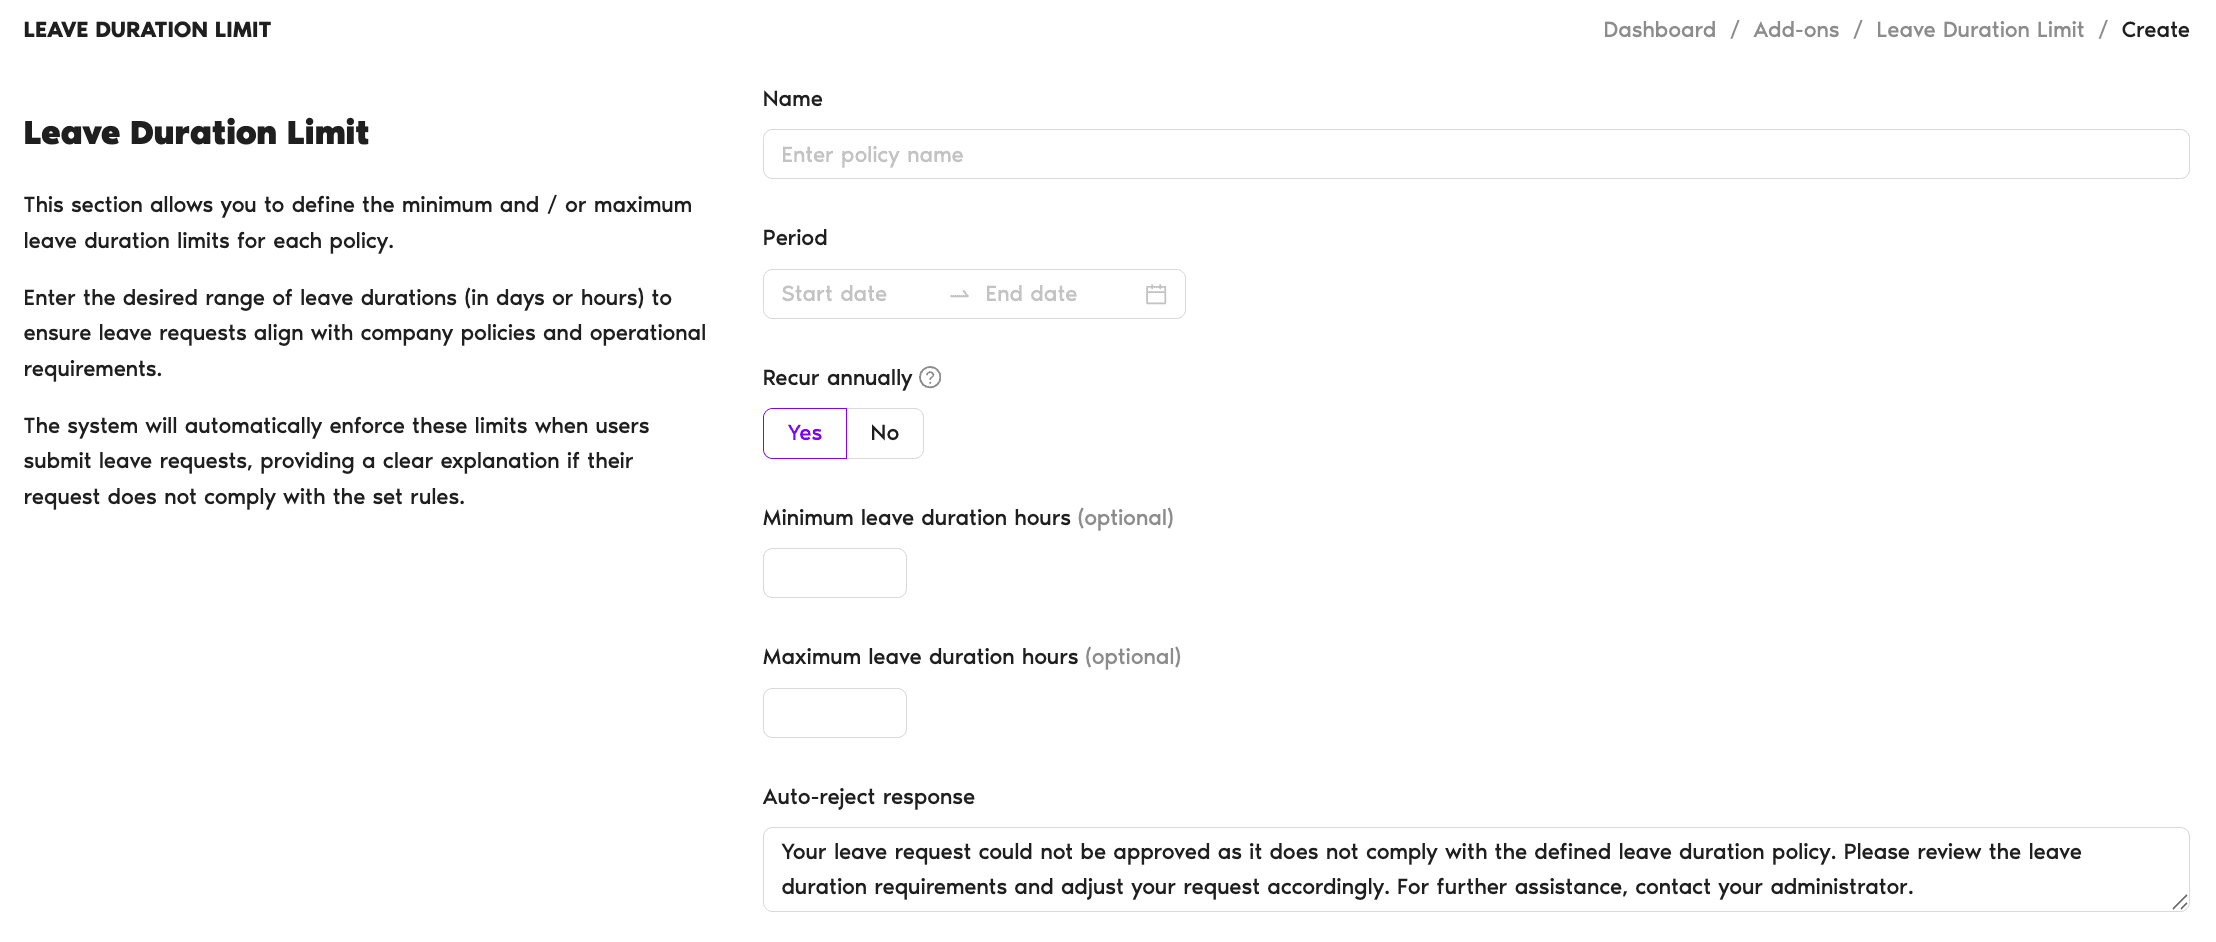
Policy Fields
- Name — Enter the policy name.
- Period — Pick a start date and an end date for the time window the policy covers.
- Recur annually — Yes/No toggle. Choose if the policy will be applied in the following years as well.
- Minimum leave duration days (optional) — Enter the shortest leave duration for this period (for example, we set 5 days to be the minimum, in order to ensure Users are taking at least one week at a time).
- Maximum leave duration days (optional) — Enter the highest number of days a User can spend during this period.
- Auto-reject response — A message that Users will receive when their leave requests exceed the limit. This field is pre-filled with default copy ("Your leave request could not be approved as it does not comply with the defined leave duration policy. Please review the leave duration requirements and adjust your request accordingly. For further assistance, contact your administrator.") which you can edit.
Who the Policy Applies To
- Apply to all Users — If you select No, you'll be able to filter the Users in order to apply the automation to a specific department, location or label.
- Filter by — Choose which locations, departments and labels this applies to. You can select multiple options.
- Leave Types — Select the leave types this will be applied to. For example, you might want to limit Vacations, but allow Users to take Sick Days if necessary.
Reviewing & Editing the Policy
After you've created your first policy, you'll be able to review it by opening Workspace Settings → Add-ons → Leave Duration Limit. You can deactivate or delete the policy there, with an option to edit the details being available if you click on the policy name.