Last updated on October 14, 2025
How do I Set a Probation Period automation?
The Probation Period automation allows Admins and Approvers to set a period during which newly hired employees cannot request leave — helping ensure new hires remain focused on onboarding and team integration.
Admin must enable firstComplete plan only
The Probation Period add-on is available on the Complete plan only. It can be set by an Approver or Admin, but an Admin must enable the automation first before an Approver can set their Probation Period policy.Setting It Up
- Log in to your Vacation Tracker account at app.vacationtracker.io/signin.
- On the left-hand side, click Workspace Settings → Add-ons.
- Click View on the Probation Period card under My Add-ons. If you haven't subscribed yet, switch to the Discover More Add-ons tab and select Probation Period there.
- Click Create automation in the top-right corner.
- Define your Probation Period Policy (see field reference below).
- Apply the policy to specific groups (see scoping section below).
- Click Create at the bottom of the form.
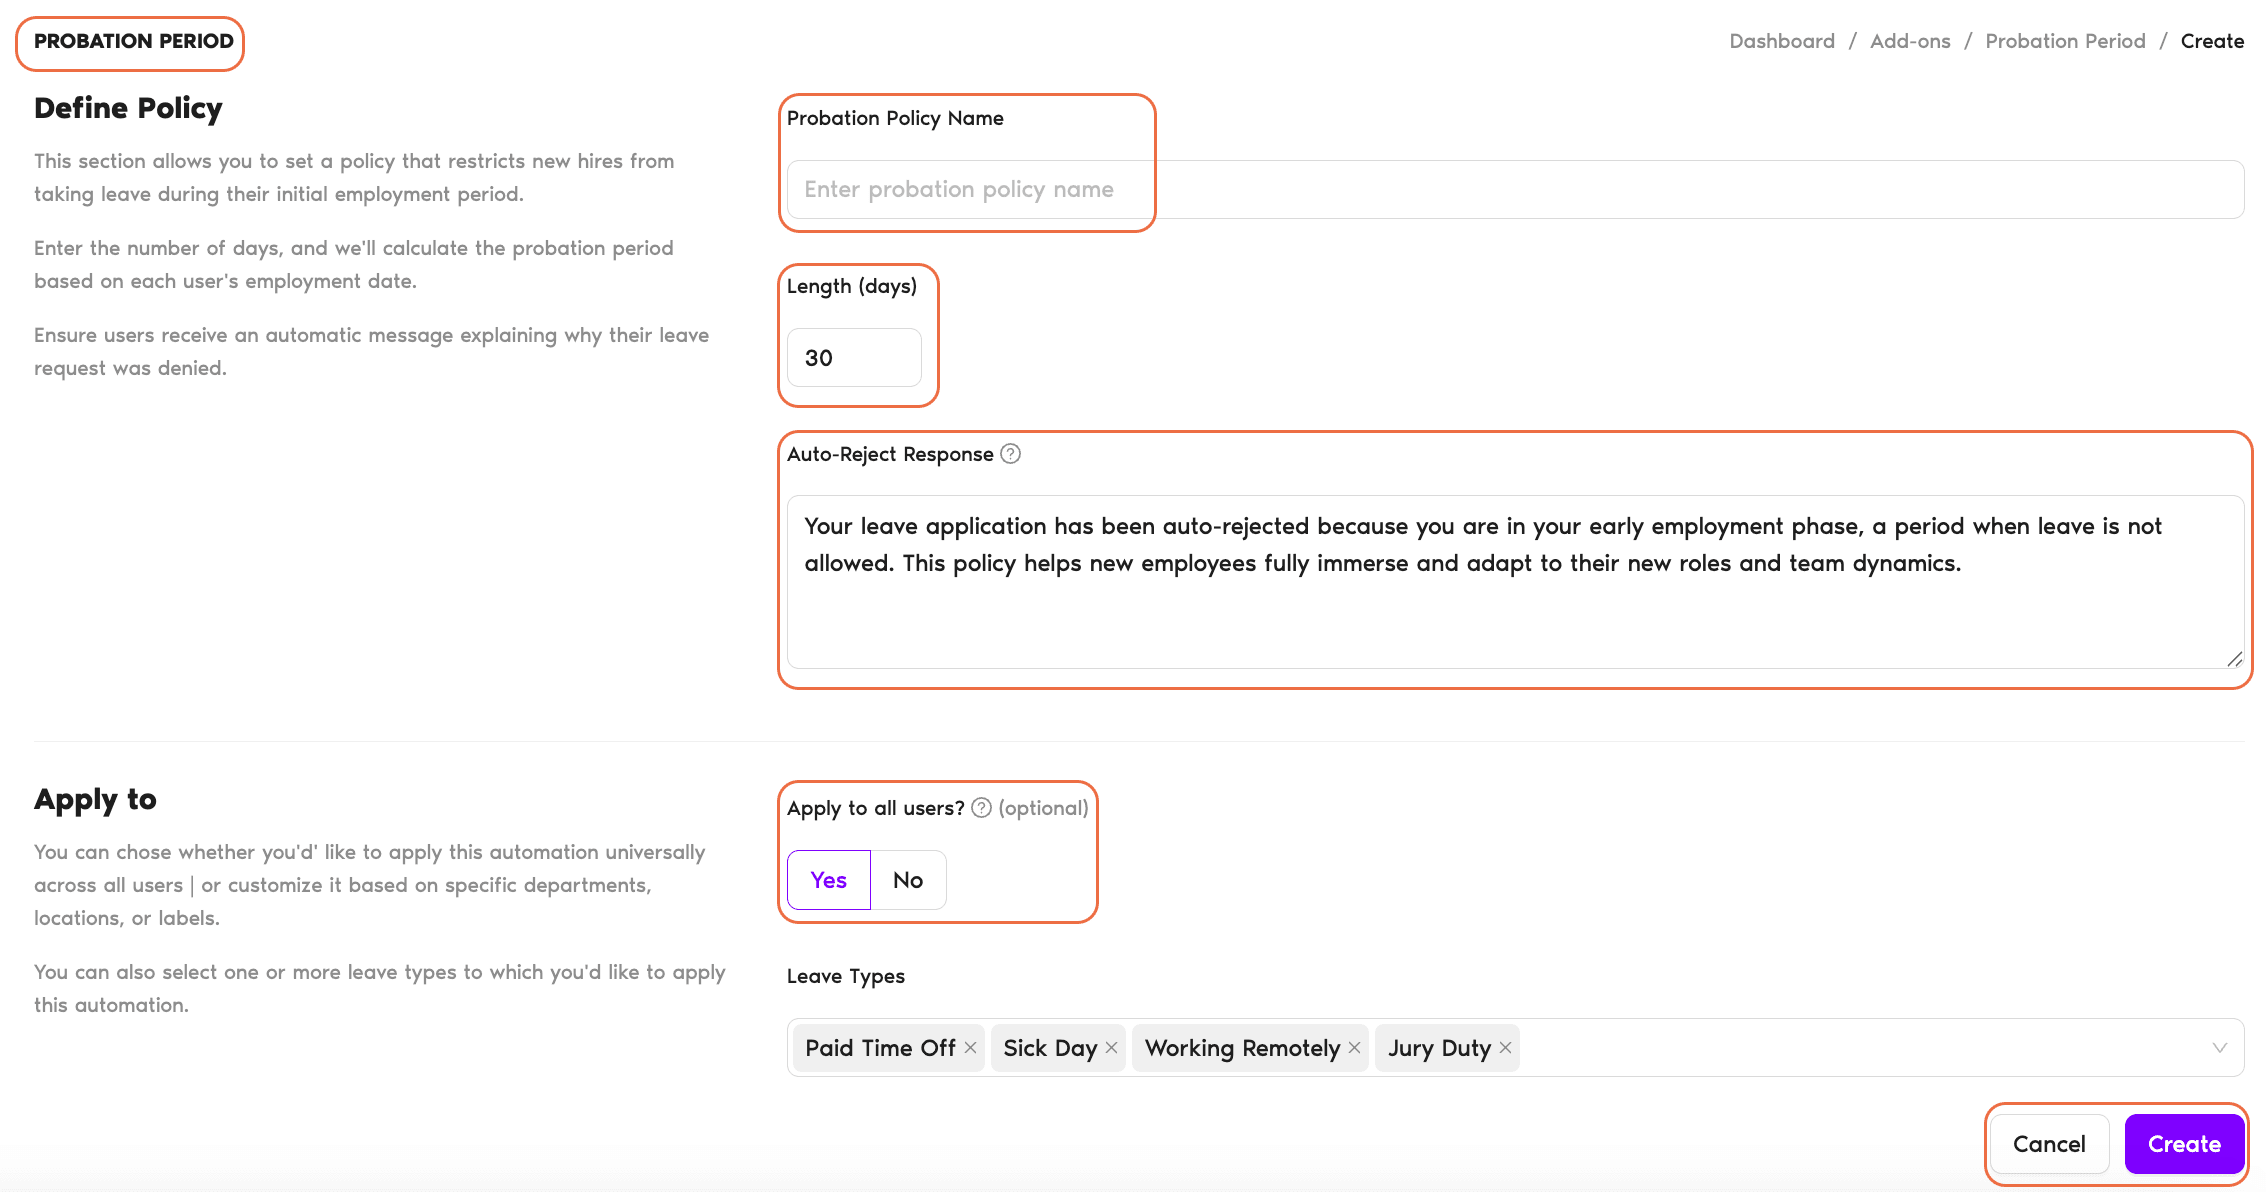
Define Your Probation Period Policy
- Probation Policy Name — Enter a name for your probation policy (e.g., "Onboarding Leave Restriction").
- Length (days) — Specify how long the probation period should last (in days; defaults to 30). This period will be calculated from each employee's start date.
- Auto-Reject Response — The automatic message employees will receive when their leave request is denied due to the probation period. The field is pre-filled with default copy ("Your leave application has been auto-rejected because you are in your early employment phase, a period when leave is not allowed. This policy helps new employees fully immerse and adapt to their new roles and team dynamics.") which you can edit.
Apply the Policy
- Apply to All Users? — Choose whether this policy should apply to all users or only specific Locations, Departments, or Labels. If you select No, additional filter options will appear.
- Locations — Select one or more Locations.
- Departments — Select one or more Departments.
- Labels — Select specific user labels (if applicable).
- Leave Types — Choose which leave types this policy will apply to (e.g., Paid Time Off, Sick Leave).
Example: If requesting Vacation days is not allowed during the probation period, but employees can take Sick Leaves, you would remove the Sick Leave from this list in order to allow them to request those leaves.
Multiple Policies & Reviewing
You can create multiple probation period policies for different employee groups or roles. To review or manage previously created Probation Period policies, go to Workspace Settings → Add-ons and click View on the Probation Period card.
Manual leaves still work
The Probation Period Automation is designed to prevent employees from requesting leave during their probation period. However, Admins and Approvers can manually add leaves for these employees if necessary.See all available automations
For more details on other Automations we offer, check out our guide: Guide: What Automations does Vacation Tracker offer?