Last updated on October 10, 2025
How Do I Set a Blackout Period for a Specific Location or Department?
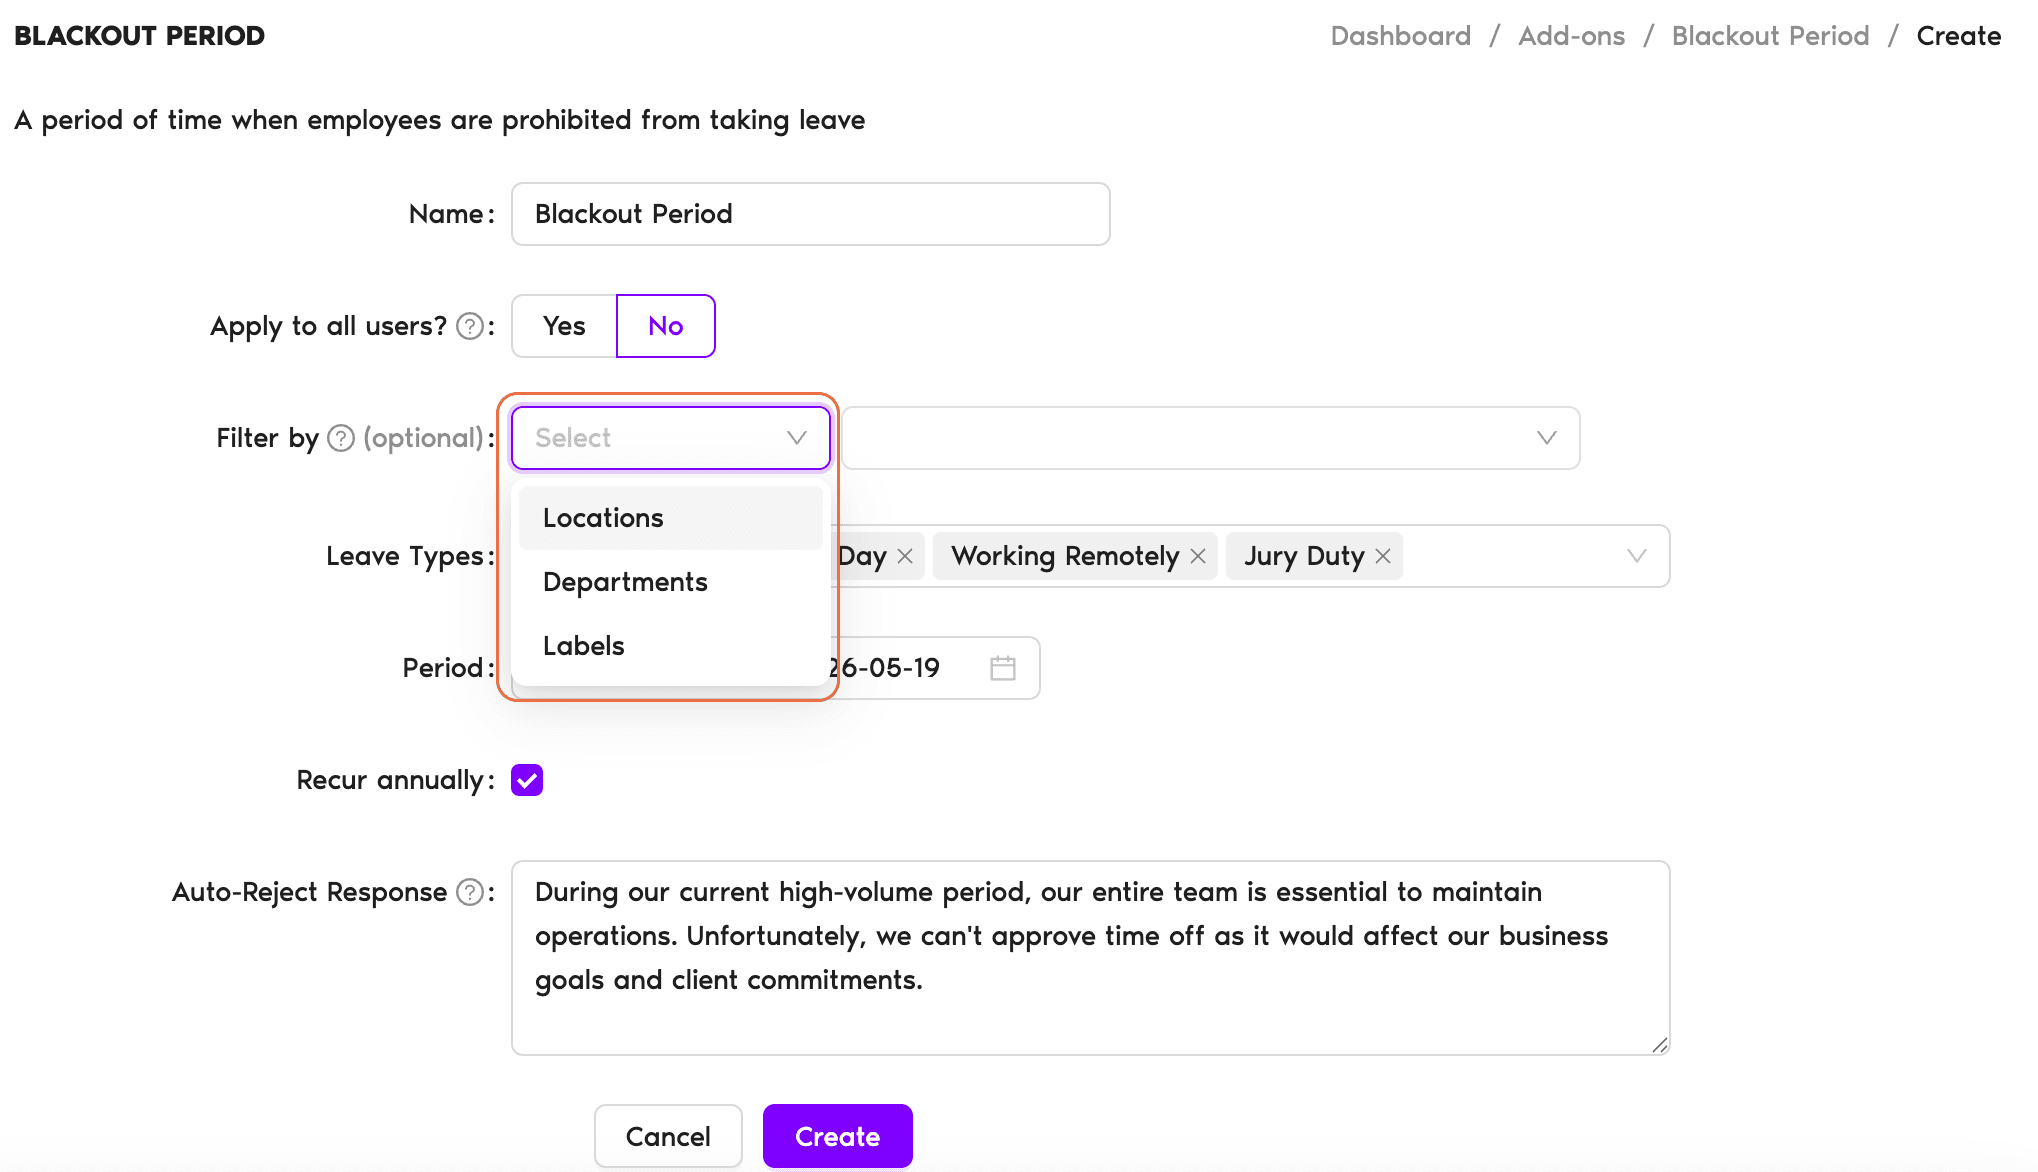
If you need a different blackout period for different locations, departments, or a specific group of people, the Blackout Period automation's filtering options let you customize as much as you need.
Add-on to the main article
This article is an add-on to the original article on our Blackout Period automation: How to Set a Blackout Period (Block Time)Setting It Up
- Go to the Vacation Tracker Dashboard — app.vacationtracker.io/signin.
- On the left-hand side, click Workspace Settings → Add-ons.
- Click View on the Blackout Period card under My Add-ons. If you haven't subscribed yet, switch to the Discover More Add-ons tab, select Blackout Period, and confirm the subscription before continuing.
- Click Create automation in the top-right corner.
- Configure the policy:
- Once configured, click on Create.
Mix and match filters
You can always mix and match different filter options by clicking on the + icon.Summary at the bottom
At the bottom of the page, you'll have a summary of how many Users the Blackout Period will affect and a summary of the policy you created.Browse all automations
For more information on the Automations we offer, please see Guide: What Automations does Vacation Tracker offer?