Last updated on October 15, 2025
How Do I Bulk Import Users? (Email Only Integration)
If you're on the Email Only integration and need to add a lot of Users at once, the dashboard's bulk-import flow takes a CSV or Excel template and creates them in one upload. Faster than the one-at-a-time Add User form for any team larger than a handful.
Steps
- Sign in at app.vacationtracker.io with an Admin account.
- In the left-hand menu, click Users.
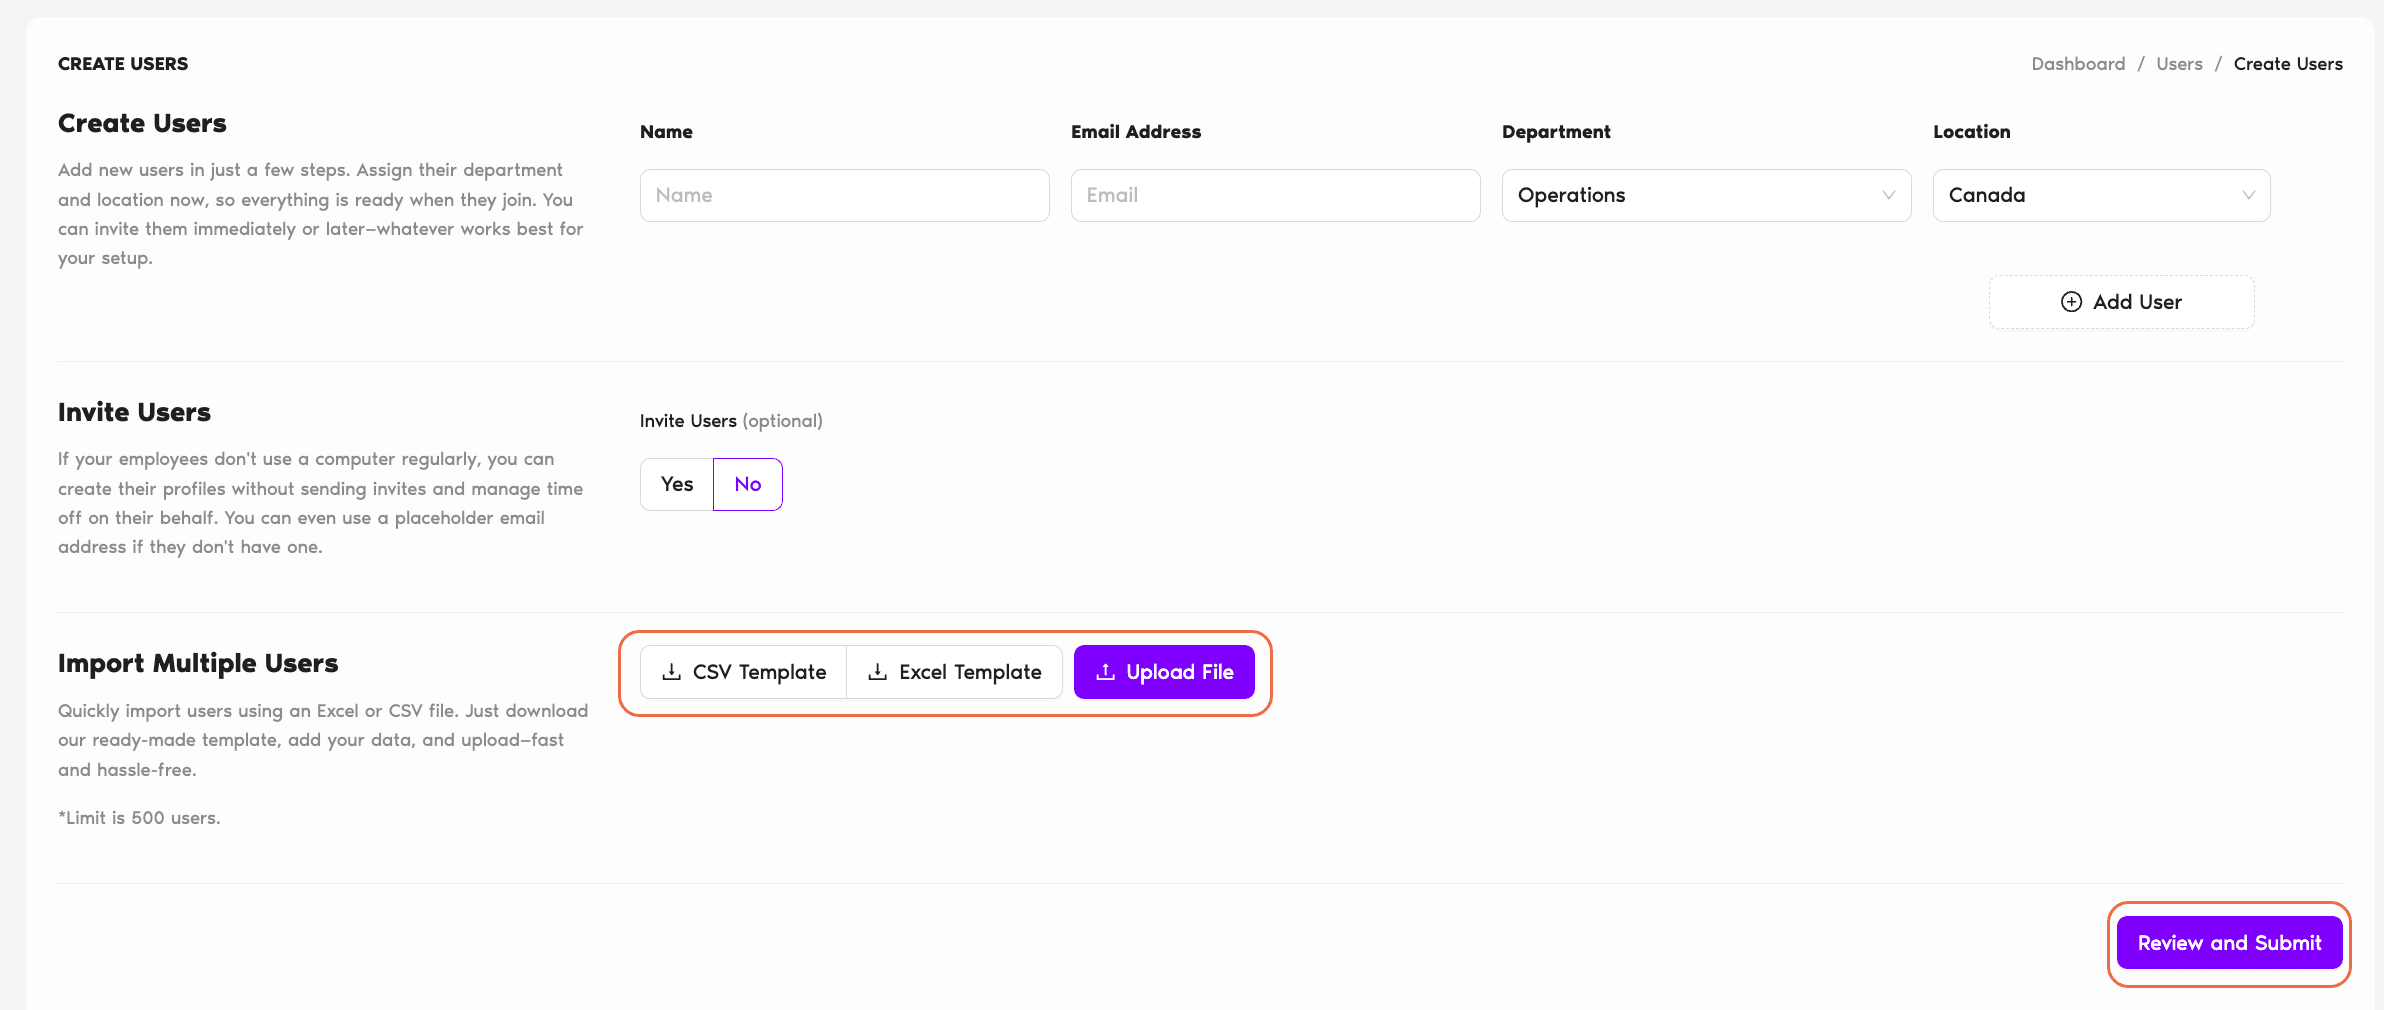
- Click Create Users at the top of the page.
- In the Create Users modal, download either the CSV or the Excel template. Both produce the same result; pick whichever your team is more comfortable editing.
- Fill out the template with your Users' information (see fields below).
- Upload the completed file back into the same modal. Vacation Tracker validates the rows and creates the Users.
Template Fields
Name Required
The User's display name as it will appear in Vacation Tracker — calendars, reports, notifications, the Users table.
Email Required
A valid email address. This is how the User will sign in (Email Only integration uses email + password) and where Vacation Tracker sends approval requests, reminders, and notifications. Each email must be unique on the account.
Department Optional
The Department to assign the User to. Must match exactly the name of a Department that already exists in your Vacation Tracker account — typos or unknown names will fail validation. If you leave this blank, the User is placed in the workspace's default Department.
Location Optional
The Location to assign the User to. Same matching rule — names must match an existing Location exactly. If left blank, the default Location is used.
What Happens After Upload
Common Questions
The import will surface validation errors for those rows. Fix the names in your file (so they match exactly) and re-upload, or create the missing Department/Location in Vacation Tracker first and then re-upload.
Email is the unique identifier — if a row's email matches a User who already exists in your workspace, that row will fail rather than create a duplicate. To update an existing User, use the User profile's Edit button instead. See How Do I Edit User's General Information?
Functionally, no — both templates produce the same result. CSV is leaner and works in any text editor; Excel keeps formatting niceties and is easier for non-technical Admins. Pick the one your team will edit more reliably.